Category Extras

Marmite Bread

Jess - Marmite bread


L

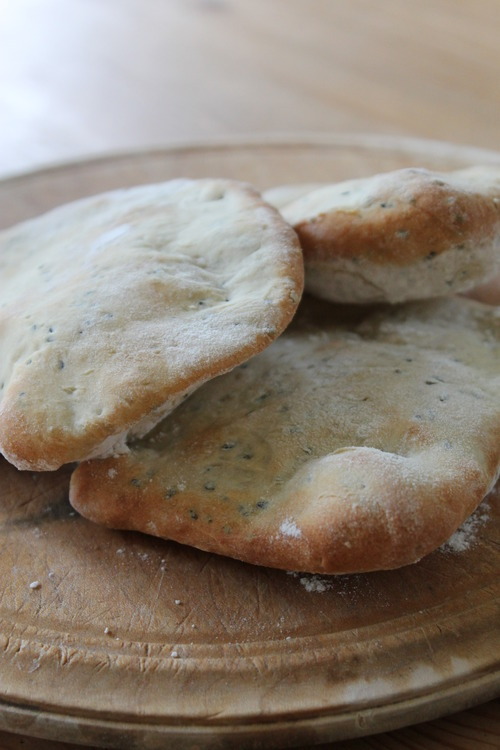
ove it or hate it bread perhaps would be a more fitting name? Now if like my family you’re partial to the odd toasted crumpet with marmite then you’ll understand the inspiration behind this bread. A rival to match an English muffin with soft poached egg is an airy warm and marmite covered crumpet with its pillowy wholes allowing the unctuous yolk to ooz through the gaps. So why not make use it in bread?

And trust me, if you’re a ‘love it’ personality then simply the act of toasting a cheeky slice of this hearty bread invites an aroma throughout the house that will have your most mature cheddar running from the fridge, willing at mercy to be sliced and lathered onto this tempting creation…..don’t knock it until you’ve tried it.

Jess - Marmite bread 5Jess - Marmite bread 3

Makes 1 loaf

  • 480g brown wholemeal strong bread flour
  • 40g molasses
  • 7g dried yeast
  • Large pinch salt
  • 2 tbsp marmite
  1. Start by combining the flour, a large pinch of salt and the molasses in the bowl of a food processor and blend until combined.
  2. Measure out 100ml of warm water and mix in the yeast, whisking until combined and fully dissolved.
  3. Add this to the mixer with another 200ml of water or so and mix until just combined.
  4. Add the marmite and pulse until incorporated
  5. Tip the mixture out onto a floured surface and knead for a good 10-15 minutes until the dough is springy, elastic and soft.
  6. Place in an oiled bowl, cover with cling film and place in a warm place until double in size (around 2 hours). I like to turn the oven on low before beginning the recipe then switch it off when its warm and this way it creates an ideal environment for the first prove.
  7. Once doubled in size, turn out onto a floured surface and knock out the air. Knead again for about 5 minutes before shaping into an oblong and placing in a greased loaf tin. Prove again until doubled in size.
  8. Preheat the oven to 180°C when ready to bake and bake the loaf for about 35-40 minutes until cooked and hollow sounding when tapped on the base. Leave to cool before slicing.

You can certainly be creative on the options for serving this bread! Toasted topped with smashed avocado and a soft poached egg as done here, or for a more decadent choice butter the outside of two slices and fill with grated mature cheddar and griddle in a pan or on a panini maker until toasted and melted.

Jess - Marmite bread 4

Leek and Parmesan Arancini, Smokey Bacon Mayonnaise

Jess - Leek Parmesan Aracncini_

Jess - Leek Parmesan Aracncini 2

W

hen I first say James Martin make this mayonnaise my mind immediately jumped to all the decedent foods it could accompany. Surprisingly it only briefly lingered on the monstrously unhealthily nature of mayonnaise and bacon!? But once in a while, a Saturday evening needs a decadent dish lovingly and patiently made – think of it as a culinary pat on the back for a hard working week. James Martin is one of those humble chefs that I trust when it comes to recipes (not to mention our matching appreciation for the use of butter) so all that was needed here was something to accompany it. One of my favourite staple flavour combinations being leek and bacon and a need for something fried and crispy for this gourmet mayo, arancini sprang to mind. In preparation for my up and coming supper club where arancini feature as my starter I thought a little more practice couldn’t go amiss. So out came the rice, butter and wooden spoon, the Italian red was decanted and dinner was set…

Serve with a lovely lemony rocket salad to cut through the oil.

Makes 15 large arancini (2-3/person)

  • 1 large onion, finely chopped
  • 2 garlic cloves, crushed
  • 70g butter
  • 200g Alborio rice
  • 1 large glass dry white wine
  • 1 litre hot vegetable or chicken stock
  • 5 leeks
  • 50g grated parmesan cheese
  • 1 lemon
  • 200g breadcrumbs
  • 2 eggs, beaten well
  • 100g plain flour
  • Sunflower/Vegetable oil for deep frying (About 1 litre)

Arancini

  1. Begin by making the risotto either in the morning before eating these or a day ahead of when you want to serve them.
  2. Melt 20g of the butter in a large saucepan or high sided frying pan with a teaspoon of olive oil.
  3. When hot, sweat the onion and garlic, lid on, for about 5-10 minutes until softened and translucent. You shouldn’t allow it to colour.
  4. Turn up the heat and add the rice. Fry for a few minutes until the rice starts to turn translucent. While the pan is still hot, add the wine and allow to bubble vigorously and absorb into the rice. Immediately turn the heat down to a medium low.
  5. Now add the hot stock ladle by ladle once each liquid addition has been absorbed. Between each spoonful allow to bubble at a very gentle simmer. Cook the rice in the stock in this way for about 20 minutes testing the rice after about 18 minutes by which time it should be soft with a slight bite but not mushy.
  6. Meanwhile while the rice is cooking fry the leeks. Melt 20g of the butter in a frying pan with a teaspoon of olive oil. Top and tail the leeks then slice in half and chop on the diagonal into thin slices. Fry on a medium heat with plenty of salt and pepper for about 10 minutes until soft and just starting to caramelise and colour. Set aside once done.
  7. Once the rice is cooked and most of the stock is absorbed you should still be aiming for a loose consistency. Remove from the heat and add plenty of seasoning to taste and then then tip in the leeks. Add the grated zest of the lemon and the juice of half.
  8. Add the parmesan and the rest of the butter and place a lid onto the pot and set aside for 2-3 minutes. After this time remove the lid and stir in the melted cheese to combine.
  9. Tip the risotto onto a shallow dish/baking tray levelling it out thinly to allow it to cool quickly and place in the fridge to chill.Jess - Leek Aracncini
  10. Once chilled, take just bigger than golf ball sized spoonfuls (or smaller depending on how you want to serve them. I suggest one large one each as a starter or 2-3 for a main) and roll into rounds. Arrange your flour, egg and breadcurmbs into 3 bowls in front of you. Dip the risotto balls first into the flour then the beaten egg and finally coat in breadcurmbs and place each on a plate. Continue until you have used up all the rice. This should make about 15 balls.
  11. Place in the fridge until ready to fry.
  12. When ready, heat a saucepan full of the vegetable oil (deep enough to immerse the arancini by at least half) or turn on your deep fat fryer. You will know when it is hot enough as a cube of bread added to the oil will sizzle and turn golden in a matter of minutes.
  13. When the oil is hot enough, fry the aracini, turning as needed, until golden brown and crisp all over. Once golden, remove using a slotted spoon and drain on kitchen towel. Keep warm while you fry the rest.

Jess - Leek Parmesan Aracncini Mayo

Smokey Bacon Mayonnaise

  • 2 egg yolks, room temperature (this is important to prevent it splitting)
  • 1 tsp Dijon mustard
  • 1 tbsp white wine vinegar
  • 6 rashers streaky smoked bacon, chopped into pieces
  • 1/2 lemon
  • 350 ml rapeseed or olive oil
  1. Begin by frying the bacon in a hot pan ahead of time until really crisp. Set aside in a bowl with the fat juices and cool in the fridge completely.
  2. Next, place the eggs yolks, mustard, juice of 1/2 the lemon and the white wine vinegar in the bowl of a food processor and set the motor running.
  3. In a very steady stream add the oil. The more slowly you add it the less chance it will split. The mixture will begin to thicken the more oil you add. Continue until you have combined all the oil and the consistency is thick and smooth.
  4. Next add some freshly cracked pepper and tip in the bacon pieces. Pulse until mixture to combine the bacon.
  5. Spoon into a small serving bowl and cover at room temperature until ready to use.

WINE: By no means do you need to fork out on an extravagant Italian bottle such as the below ‘Gaja Conteisa’ that I devoured these with. But there is something quite ironic about a greasy and mayonnaise laden ball of buttery risotto with a Super Tuscan that I won’t lie….went down like a house on fire. Italy, you made my weekend.

Jess - Leek Parmesan Aracncini Gaja_


Urfa Chilli Salmon, Polenta Chips, Smashed Avocado

I

ts been a long and draining week at work and with Saturday looming and the pressure to make the most of it I could think of nothing better than a casual blogging session in the kitchen to calm the stresses from the week and allow my mind to wonder onto the creative and less challenging. The biggest decision in this recipe was how big to cut the chips!? I went for big naturally.

On reflection, this dish is essentially Mexican fish and chips!? And its for the chilli lovers as its a spicy one so make sure you have a nice cooling beer to hand or at least some soured cream. My inspiration for this one was the cheeky jar of Ottolenghi’s ‘Urfa chilli flakes’ (see here) I received as a gift. What the ‘urfa’ are those you might ask!? Well they are a Turkish medium heat chilli with a smoky flavour. A lovely deep and purposeful taste great for barbecued meats, oily fish, roasted vegetables or chilli con carne. I used them here to coat some moist and succulent salmon fillets. Accompanied with some spicy crisp polenta chips and some smashed green avocado I felt like I bought a bit of Mexico to London. Hopefully one day I can bring a bit of London to Mexico!?

Serves 2

  • 2 salmon fillets
  • 2 tsp urfa chilli flakes
  • 1 large avocado
  • 2 spring onions, finely chopped
  • Large bunch coriander, chopped
  • Large bunch basil, chopped
  • 1/2 green chilli, finely chopped
  • Juice 1/2 – 1 lime
  • 100g fast cook polenta
  • 500ml chicken stock or water
  • 1 heaped tsp chilli flakes
  • Knob butter
  • Salt and pepper
  • Sunflower oil

Jess - Urfa Salmon 3Jess - Polenta Chips

  1. Preheat the oven to 200°C. Oil a bowl/small baking tray or something appropriate to hold your polenta in and allow it to set before cutting into chips.
  2. Start with the polenta. Bring the stock or water to the boil in a saucepan. Mix the polenta, chilli flakes and some salt and pepper in a bowl. In a gentle stream add this polenta to the stock in the saucepan, whisking all the time and turn the heat down to a medium low instantly. Whisk continuously for about 5-7 minutes until the polenta thickens and bubbles. Add the butter and mix in well.
  3. Pour the mixture into the oil lined tray spreading it out into an even layer of about 2inch thickness. Quickly chill by placing in the freezer for 5-10 minutes and then in the fridge and cooling completely until set.
  4. Meanwhile mix the urfa chilli flakes and some salt and pepper with a tablespoon of oil. Rub this on the salmon fillets and leave to marinade at room temperature.
  5. Next, cut the avocado into chunks and use a fork to mash into a chunky paste. Season and then add the spring onion, herbs, lime juice and combine into a chunky paste. Check the taste and add more lime if needed.
  6. When the polenta has set, turn it out onto a chopping board dusted with lots of excess polenta. Chop the set polenta (which should be the texture of halloumi!?) into chip sized chunks and roll in the excess polenta.
  7. Heat a frying pan on a medium high heat and fry the chips in a few tablespoons of sunflower oil until golden brown all over making sure they don’t stick to the pan or catch. Once crispy remove from the pan, scatter with flaky sea salt and set aside to keep warm.
  8. In the same pan cook the salmon on a high heat skin side down for about 1 minutes to crisp the skin. Turn to char the flesh side for about another minute or so before placing in the oven skin side down to finish cooking for no more than 5 minutes to ensure it remains succulent and just pink.
  9. To serve, top the chips with the salmon and spoon on a generous quenelle of avocado. Scatter with extra coriander and chilli flakes if you like

Have some beer or soured cream to hand…

Jess - Urfa Salmon 2


Baked Hummus

H

ealthy’ food could not be more in our face at the moment with celebrity chefs in the media, tortuous instagram or yet another cookbook launch. While some are giving out a positive message on the whole I can’t help but feel that those that are taking it to the extreme are frankly just quite annoying? What ever happened to a balanced diet I don’t know. Some fads I have kindly embraced – avocado toast for example with lashings of lemon and maldon salt, but at this time of year the thought of a raw pizza (whatever that is…a cracker I think!?) washed down with a kale and spinach juice sends icy and fun-killing shivers down my spine. What with January being plagued with this health theme and matched with the chilly winter weather we’ve been experiencing lately I am craving warmth from soups, stews and slow baked dishes which by all means can be healthy too.

Take the humble, versatile and much loved hummus. Warm and familiar when deep fried as falafel, there is nothing stopping it being baked and devoured ‘fondue style’? And yes, you are more than welcome to imagine you are enjoying a fondue….just with far less milk, fat and cheese hangovers. Eat as you would fondue or enjoy smothered on your favourite toasted bread.

A delicious, healthy adaptation for the winter weather.

Serves about 4

  • 1 can drained chickpeas (250g approx)
  • 1 heaped teaspoon cumin seeds (dry toasted and then ground)
  • 1 teaspoon spice mix (see here – optional)
  • 2 tbsp olive oil
  • Juice 1 lemon
  • 1 tbsp tahini
  • 3 tbsp thick yoghurt
  • Seasoning
  • Handful pine nuts
  • 1 tbsp butter
  1. Preheat the oven to 200°C.
  2. Place all the ingredients (except the pine nuts and butter) into a food processor and blend until thoroughly smooth. You may need to scrape down the sites a few times.
  3. Add more yoghurt or oil to vary the constancy to your liking.
  4. Spoon the hummus into a small ovenproof serving dish or bowl
  5. Heat a large frying pan and dry toast the pine nuts until golden. Add the butter and remove from the what while it browns and melts.
  6. Top the hummus with the buttery nuts and place in the oven for 25-30 minutes.
  7. The mixture will warm and turn golden. If you use a thin consistency it may even rise a little.
  8. Serve with crudités, warm toasted pitta breads, rye bread etc.

This is lovely served warm as a shared starter with crudités or warm pittas. Alternatively as a light lunch I had mine smothered on lemony avocado on toasted rye bread and sprinkled with flaky salt…..

Jess - Warm Hummus Avocado_

Pistachio and Feta Dip

Jess - Pistachio feta dip2 Jess - Crackers

N

ot another dip I hear you say? And not another Moroccan and middle Eastern themed recipe. Yes. Please continue. A boozy and wonderful dinner party in the Wiltshire countryside this weekend was enhanced as it naturally would be by the addition of a Middle Eastern themed feast! And gracious guests of course! And the weather seemed to be on it best behaviour for most of the time rather suitably while we guzzled bubbly Saumur and nibbles. The downpour and lightening only theatrically threatened to steal the attention late into the evening when the food had already stolen my guests hearts. It reminded me a little of my recent venture to Morocco where a hearty downpour after a heavy humid day was still not enough to spoil the show once the hearty tanginess graced our dining tables.

Kicking off with a round (or two) of sparkling Saumur, my new and cheaper favourite alternative to Champagne, to set the tone, this cheesy spiced Turkish/Bulgarian dip went down a treat. A lovely alternative to the usual humus this is perfect with some mini ‘olive oil cracker tongues’ (see here) adapted with the addition of some sweet smoked paprika and rolled smaller and bite sized.

While the middle East is always a source of natural inspiration for me, both these recipes were inspired by a new cookbook purchase that has weakened my already full and bursting cookbook shelf. Bought on a whim having been won over in a trace by the initial sparkling textured cover and once in side, by the beautiful photos and recipe combinations that steal my foodie heart. Adapated slighty but quite welcomely without much amending. Persiana, Sabrina Ghayour. A delightful book for any cookbook collector, food lover or photography buff.

Serves 8 as a nibble with drinks

  • 100g pistachios, shelled
  • 75ml olive oil
  • 200g feta cheese
  • Handful chopped dill
  • Large bunch of coriander leaves
  • 1 garlic clove, crushed
  • 1/2 red chilli, chopped
  • 3 tbsp Greek yoghurt
  • zest 1 lemon, juice of 1/2
  • Salt and pepper
  • 1 tbsp dukka (see here) to garish (optional)
  1. Blend the pistachios and oil in a processor for 30 seconds.
  2. Add the rest of the ingredients and blend until you get a smooth but rustic texture. Season to taste
  3. Spoon onto a shallow bowl or plate. Sprinkle with any leftover dill leaves, the dukka and drizzle with a little extra virgin olive oil.
  4. Serve with olive oil crackers.

Dips and drinks were followed by a slow roasted, shredded and falling off the bone leg of  lamb spiced to the nines with Moroccan love. Zesty lime yoghurt and cumin dipping salt on the side of a fresh allotment picked raw vegetable salad….

Serves 8-10

  • 1 large leg of lamb on the bone (2.5kg approx)
  • 50g butter
  • 2 tbsp ground coriander
  • 1 tbsp ground cumin
  • 1 tbsp cumin seeds
  • 2 tsp paprika
  • 1 tsp cayenne pepper
  • 1 tsp dried thyme
  • 4 garlic cloves, crushed
  • 1 tbsp sea salt flakes
  • Handful coriander leaves to garnish

Cumin dipping salt

  • 2 tbsp cumin seeds
  • 2 tbsp flaky sea salt
  • Pinch cinnamon
  1. Preheat the oven to 160°C and line a large roasting tin.
  2. Mark deep incisions over the lamb with a sharp knife
  3. In a small bowl, place the butter, spiced, thyme, and garlic and blend into a paste. Rub the paste over the land and into the incisions.
  4. Place the lamb in the tin and pour in 1 large glass white wine. Cover with foil and cook for 4 hours.
  5. During this time, baste the lamb with any juices every 40 minutes or so.
  6. After 4 hours, turn the oven up to 190°C. Remove the foil and finish the cooking for the final 1 hour uncovered to brown the top and crisp the skin.
  7. Meanwhile, for the dipping salt, dry fry the cumin seeds in a hot frying pan for a few minutes until fragrant. Tip into a pestle and mortar and grind. Add the salt and cinnamon and grind together lightly. Tip into a small ramekin or bowl.
  8. After 5 hours, remove the lamb from the over. Cover with foil and leave to rest for about 15 minutes.
  9. When ready to serve, carve the lamb which should tenderly fall from the bone. Carve into chunky pieces and slice the herbed skin. Serve on a large warmed serving platter, scattered with coriander leaves.
  10. Serve e.g some turmeric and cumin roasted new potatoes, fresh raw green salad and a limey creamy yoghurt.

Jess - Lamb Jess - Lamb2

Pea and Avocado Dip with Sprouted Olive Oil Crackers

Jess - Cracker2

Jess - rudehealth

F

irstly I think I need to explain the mystery behind the ‘Sprouted Olive Oil Crackers’. As if the wholesome organic produce that Rude Health so stylishly provide wasn’t tempting enough, they have developed a range of ‘sprouted flours’. Nothing to do with sprouts, nothing to do with flowers…..These flours basically contain a grain that has been allowed to sprout and germinate in an environment which stimulates enzyme activity and allows for the transformation of wonderful nutrients. Soaked in water, the grains sprout and release nutrients and once slow fired and and stone ground these are captured inside these tasty flours ready for your baking purposes. Nutty, wholesome and devine, they can be used in baking like for like to add a fantastic texture and flavour layer. Here I used the flour in some lovely giant tongue shaped crackers which I often make for dinner parties as elaborate dipping utensils!

They are amazing served with dips and spreads. I’ve made these in the past but never with sprouted flour and the baking smell alone as they crisped away in the safety of the oven was enough to inspire a healthy dip to accompany.

Makes about 15 dependant on size (adapted from Ottolenghi)

  1. Preheat the oven to 220°C and line a large tray with baking parchment.
  2. In a large bowl or food processor combine all the ingredients except for the salt until you have  affirm dough.
  3. Leave to rest for 30 minutes or so in the fridge.
  4. When ready to cook, take walnut sized pieces of dough (about 15g) and roll on a floured surface into tongue or oval shaped crackers, paper thin if you can!
  5. Repeat and place on your lined backing tray. Drizzle well with olive oil and scatter with the sea salt.
  6. Bake in the oven for about 6 minutes or until crisp, golden and filling the kitchen with wonderful smells.
  7. Leave to cool on a wire rack before enjoying with a dip or choice.

Pea and Avocado Dip (Serve 4-5 as a starter/nibble)

I saw a version of this recipe in a recent Waitrose magazine. Having been invited to a last minute impromptu BBQ I felt I needed a culinary offering which is where this speedy dip was created. To my disappointment this said recipe wasn’t particularly inspiring on the taste delivery. It was a bit bland. However, with a complete recipe makeover and the addition of some forage in the pantry flavour staples I had a tasty vibrant dip in no time to accompany my sprouted olive oil crackers. Knocked out in minutes I just had time to grab a bottle of chilled white before heading out into the sun….

  • 150 peas, defrosted or fresh
  • 1 lime, juice
  • 1 crushed garlic clove
  • 1 tbsp creme fraiche
  • 15g pistachios
  • 1 avocado, chopped into chunks
  • 1 tsp spice mix (see here)
  • 60g feta cheese
  • Handful mint leaves
  • Chives, dill and chilli oil to garnish
  1. In a food processor, please the peas, lime juice, garlic, pistachios, creme fraiche, spice mix and mint. Pulse and blend until the mixture turns into a paste. You may need to scarp the sides down as you go.
  2. Add plenty of seasoning and then add the feta cheese and avocado.
  3. Blend again to form a smooth paste. If you like it a bit thinner, add some olive oil.
  4. Serve scattered with chopped dill and chives and drizzled with chilli oil

Jess - Peaavocadodip2


Boy Beer Bread


image

I decided to re-name this recipe (courtesy of Gordon Ramsay and the local paper) ‘Boy Beer Bread’ because I think it will satisfy some certain requirements. Beer (check), quick to make (check), carb-laden (check) and great with bacon (check). It is not however filled with naked ladies….. sorry (I think?) It is only bread. So, now I’ve crudely stereotyped the male population, here’s the recipe…

Firstly, I will add that its very much like a soda bread in texture and taste. Soda bread usually rises based on the bicarbonate and buttermilk creating some lovely air bubbles but here the beer was enough to make a risen loaf. I was a little worried so added a pinch of bicarb too but Ramsey doesn’t feel the need so feel free to leave it out.

  • 175g self raising flour
  • 75g wholemeal raising flour
  • 250ml beer/lager
  • Pinch of salt
  • Pinch of bicarbonate of soda
  • Milk to brush the top
  1. Preheat the oven to 180°C and grease and line a loaf tin.
  2. Place the flour, bicarb and salt into a bowl. Add the beer, mixing while you pour until combined with few lumps (it will be runny though don’t panic)
  3. Fill the loaf tin with the mixture and bake for 30 minutes. After this, brush with milk and scatter with a little flour. remove from the tin and place directly on the wire rack in the oven and cook for a future 10 minutes or so until cooked through, and the bottom sounds hollow when tapped.
  4. Leave to cool.

I suggest serving slathered with salted butter, ketchup and greasy smoked bacon or cheese…oh and with beer, no?

Seeded Pitta Bread

This recipe was courtesy of Paul Hollywood and was also extremely simple which was a welcome attribute considering it was my first attempt at homemade pittas! There are many homemade recipes which the supermarkets just cannot beat and this is certainly one of them. After making these I’m pretty confident in my suspicions that the shop bought pittas are in fact made from recycled cardboard…….

Serves 6

  • 250g strong white bread flour
  • 15g nigella seeds (or any other seed of choice e.g. cumin, caraway)
  • 7g yeast sachet
  • 120-140ml water
  • Salt
  • Olive oil
  1. Mix the flour, salt, yeast and seeds in a large bowl. Add a splash of oil and about 120ml of water.
  2. Use your fingers or a fork and bring it all together to form a dough. I didn’t need to add much more water but it will vary depending on your flour. Combine to form a dough that is sticky-ish but not too wet.
  3. Tip onto a floured surface and knead for 5-10 minutes until the dough is elastic, smooth and soft.
  4. Place in an oiled bowl, cover with cling film and leave somewhere warm to double in size.
  5. Preheat the oven to 250°C and place a baking tray or hot stone inside to warm through. Once doubled in size, knock back the air from the dough and divide into 6 pieces.
  6. Roll thinly into an oval shape. Remove the hot tray from the oven and quickly sprinkle it with flour before placing as many pittas on top as will fit and bake for about 5-7 minutes until they have puffed and are golden but not too crisp. Check after 5 minutes and turn over if they are still too soft on the underside.
  7. Repeat with the remaining dough and when cooked wrap in a tea towel to soften and cool a little. Slice open and fill with a filling of your choice….in this case pulled pork. These are also fantastic dipped into hummus or baba ganoush!

image

Almond Milk


image

I’m not a religious soya milk/nut milk drinker but I prefer it on my granola or porridge etc. However, with its aura as a ‘healthy’ ingredient I was horrified to realise that your generic ‘Alpro Soya’ is sweetened and full of, not only sugar, but other additives too. Even the unsweetened version has a lengthy list of ingredients. Whats natural about that? Normal milk does get a beating from health freaks but at least there is no ingredients list on the label. Its like a lot of vegan and vegetarian food in that they get a reputation for being ‘healthier’. Sure tofu may have less fat than a sirloin steak, but its made with unnatural ingredients that won’t provide you with any health benefits unlike a steak.

So long story short, I thought I’d have a go at making my own nut milk which it turns out is painfully easy. This is a fantastic alternative to milk for your vegan buddies and takes two simple natural ingredients.

  • 200g whole almonds
  • 650ml cold water

1. Soak the almonds in the water overnight.

2. The next morning drain and add to a food processor. Coarsely chop with a pinch of salt and then add another 650ml of cold water, splash by splash until creamy.

3. Once all the water is added, blend until combined

4. Pour into a bowl lined with some muslin cloth and strain the ‘milk’ from the solid almond pulp. Bring the sides of the cloth up and squeeze out as much liquid as you can.

image

image5. Add half a cinnamon stick if you like and then leave to infuse and chill in the fridge.

6. Store in a sterilised jar and keep in the fridge for about 3 days.

Note: I dried out the pulp almonds a little and used them in a cake as a ground almond/flour alternative. It was fairly successful but it added a huge amount of moisture. So I suggest really wringing out the pulp in the  muslin or drying them a little before use.

image

Cheese Straws

I made cheese straws for a Christmas party at uni one year and they became an infamous crowd pleaser specifically with my favourite girlies on Tyndell’s Park Road! So exam time called for supplies to fuel everyone on!

This batch included simple mature cheddar with a kick of cayenne but I also made a sage, cheddar and cumin seed variety so feel free to add whatever you like. Thyme, rosemary, Dijon mustard or marmite. I’ve left quantities out as they can literally be made with any leftover puff pastry scraps and any lonely cuts of cheese!

  • A block/leftover puff pastry (see here if you want to make your own)
  • Mature cheddar cheese (or any other strong hard cheese)
  • Parmesan cheese (optional)
  • Pinch of cayenne pepper
  • 1 egg, beaten
  1. Preheat the oven to 220°C and line a large baking tray with greaseproof paper.
  2. Simply roll out your puff pastry into a rectangle to a few millimetres thick. (If using marmite, mustard, pesto or any type of spread, brush the sheet with a very thin layer at this point). Brush the sheet with beaten egg.
  3. Grate over a thin layer of cheese making sure you don’t leave the edges bare. Season with a little salt and black pepper and sprinkle with cayenne if you like (At this point add any other herbs, seasonings, spices etc)
  4. Use your rolling pin to gently press the cheese onto the pastry to keep it stuck down and cut the pastry into strips about 1.5cm wide.
  5. Take the strips at both ends and twist into a spiral and place on the tray, squashing the ends onto the tray to help them stick and hold their shape. Brush any exposed pastry with beaten egg and bake for about 15minutes checking now and again until golden.

Avoid the urge to devour the lot alone. Best eaten warm but also amazing dipped into any spicy dips or spreads or served as a canape in mini form. Their greasy buttery taste goes particularly well with a glass of Champagne and Prosecco so any excuse for a glass of fizz naturally calls for these. Try this Biancavigna, Prosecco Spumante Brut NV available at Armit Wines

image

image