Posts tagged cake

Coffee and Date Drizzle Cake


image

image

image

image

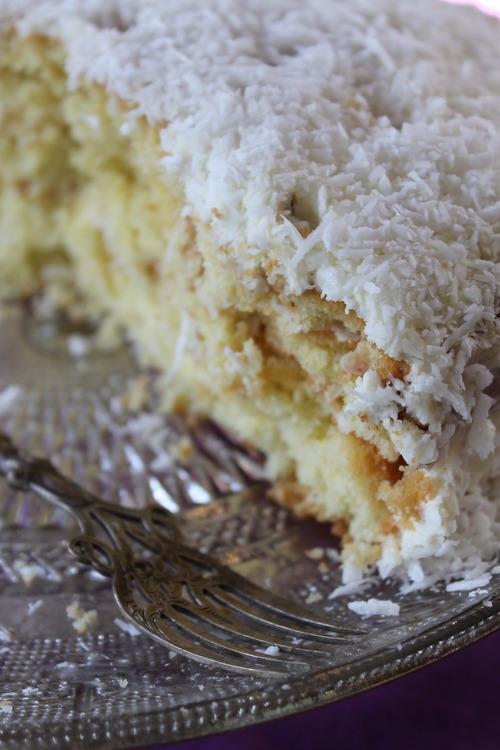
This cake is moreish, moist and had me (who has the most pathetic of sweet tooth) eyeing up my second piece as I licked the crumbs clean from my greedy fingers after my first piece. Its not as ‘coffee-ey’ as a traditional coffee and walnut sponge but the use of this Percol fine powdered espresso coffee works wonderfully to create a deep coffee background hum. Super fine and smooth and a good way to get your coffee cake hating friends to relish the joys of this treat.

Feel free to experiment a little here with the icing flavour or dried fruit. Figs or prunes would be effective for example instead of dates. Try soaking them in brandy, cognac or even rum first! Try flavourng your icing with cinnamon or cocoa for a mocha effect. However, I feel the icing needs to be coffee flavoured to really bring out the flavour in this cake!

1 small Cake

  • 110g unsalted butter
  • 220g caster sugar
  • ½ tsp vanilla extract
  • 2 small eggs
  • 75g ground almonds
  • 100g self raising flour
  • ½ tsp bicarbonate of soda
  • 12g cocoa powder
  • 160ml strong coffee (I used Percol espresso powder), cooled slightly
  • 65ml buttermilk
  • 80g dates, sliced (reserve a few for decoration)

Icing

  • 250g mascarpone
  • 80g sieved icing sugar
  • 1 tsp coffee mixed with a splash of boiling water.
  1. Preheat the oven to 190°C. Line and grease 2 cake tins. I used 2 small 6inch tins so the sponges were fairly thick. Make up the coffee and soak the dates in the hot liquid briefly if you like.
  2. Cream the butter and caster sugar together until fluffy. Whisk the eggs and vanilla and add, a bit at a time, until combined with the buttercream.
  3. Sieve together the bicarbonate, flour, almonds and cocoa and fold in to the egg mixture.
  4. Mix in the cooled coffee and the buttermilk to form a smooth batter and divide equally between the tins.
  5. Bake in the oven for about 20 minutes and then turn the temperature down to 180C°. Bake for a further 25-30 minutes or until a skewer inserted comes out clean.
  6. Meanwhile, make the filling. In a large bowl beat the mascarpone with the icing sugar and add the coffee. Chill until needed.
  7. Make the syrup by mixing together about 1 tbsp of coffee with 50ml hot water and a tbsp of caster sugar.
  8. Once the cakes have cooked, remove from the oven and leave in their tins to cool for 10 minutes or so. Prick the cakes and spoon over the syrup and leave to cool completely.
  9. Once cooled, they are ready to ice. I could have got away with cutting each of my sponges in half horizontally to make a 4 tiered cake but do as you please. Divide the icing over the sponges.
  10. Decorate with some slices of dates and some crushed cocoa nibs if you like!

image

image

image

image

Gooey Cinnamon Cake Bites

image

If you haven’t already checked out the ’smitten kitchen’ food blog then do. Not only is it one of the first blogs that I was introduced to but it is a prime example of a fantastically interesting, honest, varied and drool-worthy food blog created by a passionate foodie who cooks from the heart simply because, like me, she is addicted- cooking is my happy place. However, more so, she has been one of the lucky ducks to get her humble blog made into a cook book. I can only dream of this priceless achievement! However, this is not going to happen by cooking other peoples recipes but the sound of cinnamon (one of my favourite flavours), gooey promises and the multiple times I had clicked on the recipe link only to mutter ‘I must make that’, prompted this recent cake-tin-filler. Here is the original recipe for those interested.

Base

  • 190g plain flour
  • 2tsp baking powder
  • 115g butter, room temp
  • 150g sugar
  • 1 egg, room temp
  • 60 ml whole milk
  • ¼ tsp salt

Gooey Top

  • 60ml golden syrup
  • 60ml whole milk
  • 1 tbsp vanilla extract
  • 170g butter, room temp
  • 225g sugar
  • ¼ tsp salt
  • 1 egg, room temp
  • 155g plain flour

Cinnamon Crust

  • 2 tbsp caster sugar
  • 1 ½ tsp ground cinnamon
  1. Start by lining a 9inch x 13inch cake tin with parchment. This may seem big but it is a flatish style cake/cake bar. Preheat the oven to 180.
  2. Start with the base by blending the butter and sugar in a processor or with an electric whisk until fluffy. Add the salt.
  3. Combine the egg and milk and mix into the butter and sugar until combined. Finally sieve in the flour and baking powder and stir to form a thick batter.
  4. Spoon it into blobs into the lined tin and spread out evenly and thinly with a spatula
  5. Now for the gooey layer, beat the butter and sugar together (no need to wash the processor) with the salt until fluffy. Add the egg.
  6. Combine the syrup, vanilla and milk.
  7. Sieve in 1/3 of the flour followed by half the syrup-milk mix. Add another 1/3 of the flour and then the final half of the syrup. Finally mix int he final 1/3 of flour and blend until smooth and delectable.
  8. Scrap large spoonfuls of the batter on top of the base and spread out evenly with a spatula until flat.
  9. Combine the sugar and cinnamon for the topping and scatter generously over the top to form a crusty cinnamon coat
  10. Bake for 25 minutes. It should feel slightly soft but gently et in the centre. Remove from the oven and leave totally alone to cool before removing from the pan.
  11. Cut into bite size pieces if you like.

image

Lime Layer Drizzle with Blackcurrant and White Chocolate


image

Its been a frustrating week of unknowns but what can be guaranteed- as so rightly put by Julie from ‘Julie & Julia’- is that at the end of the day you can always rely on eggs, sugar, butter and flour producing something delicious. Chuck in some gooey lime syrup, some sharp mouthwateringly-tart blackcurrant puree and the soothing sweet sugary hug of a palate knife of white chocolate buttercream and you’ve got yourself the solution to any first world trauma…(excluding obesity….!) With too many handpicked blackcurrants from the allotment to fit in the freezer- yes the frozen joints of meat and 2 year old pack of fish fingers for those emergencies had to be sacrificed- it was time for the blackcurrants to earn their keep. With a vat of blackcurrant sorbet and enough jam to keep a Frenchman happy, it was time to use them in a new recipe.

If you can’t get hold of blackcurrants (get in touch, our crop would supply international orders) then blackberries would be good too but the tart sharpness of the blackcurrants is really lovely with the white chocolate.

image

image

image

Serves….many!

Cake

  • 225g unsalted butter, softened
  • 225g golden caster sugar
  • 225g self raising flour
  • 4 eggs
  • 1 1/2 zest lime
  • 85g caster sugar
  • 6 tbsp juice (about 1 ½ limes)

Fillings

  • 300g blackcurrants
  • 100g caster sugar
  • 100g white chocolate
  • 140g unsalted butter, softened
  • 140g icing sugar, sieved
  1. Preheat the oven to 180°C and line two small (16cm) cake tins.
  2. Beat the butter and caster sugar together until pale and creamy. Add in the beaten eggs one at a time followed by the lime zest.
  3. Sieve in the flour and fold in to combine.
  4. Spoon into the tins and even out. Bake for about 40-50 minutes until just cooked and springy to touch.
  5. While they are baking, combine the 85g caster sugar, and the lime juice and warm over a low heat to dissolve the sugar. As soon as the cakes come out the oven, prick all over with a tooth pick and spoon the syrup over the two cakes, allowing it to seep into the holes. Leave to cool COMPLETELY in their tins before turning out.
  6. For the blackcurrant puree, wash the blackcurrants so they retain a bit of water on their skins and heat with the sugar in a pan over a medium heat until they begin to burst and soften and turn a little syrupy. Don’t boil and obliterate them, as soon as they start to simmer, remove from the heat. Puree in a food processor or the like until smooth.
  7. Tip into a sieve and strain out the pips and skins to achieve a smooth glossy puree. You should get about 180g (ish).Chill until needed.
  8. For the butter cream, melt the white chocolate in a heatproof bowl over a pan of simmering water. Give it a beating if it is a bit lumpy to get a smooth melted chocolate. Leave to cool a little.
  9. Combine the sieved icing sugar and softened butter until smooth and then beat in the melted chocolate. Set aside until needed.
  10. Only when the cakes are completely cold, slice each into half horizontally to get 4 layers. Place one layer on a cake stand and then spread ¼ of the buttercream evenly over followed by a generous spoonful (just under 1/3) of the blackcurrant puree. Place another layer on top and repeat, finishing with a top layer of buttercream if you like.image
  11. Sit back and admire your effort before devouring.

Rhubarb and Amaretto ‘Cake’


image

The 1st August was ‘forage in the pantry’s’ 1st Birthday, hurrah! Some spritely rhubarb was nestled patiently outside in the garden so I stole it for this sweet celebration cake. However, cake, torte or tart- I don’t know? It has an impressively gooey and unthinkably moreish texture with a layer of juicy rhubarb and a sinful almond paste spooned slutily on top. But, regardless, its one of those recipes that surprises me with its flavour every time I make it (and equally makes me angry as I merrily start and  get everything ready only to get to the step that says ‘leave to dry overnight’ which I always seem to forget). It has a  very moist texture and, like I say, the recipe suggests leaving the rhubarb to drain overnight once cooked. I was too impatient and left it a hour or so which was effective but it was very gooey but still delicious. I thought however, that this recipe was finally worth sharing as it was first kindly shared with me a while ago.

  • 1kg rhubarb, chopped
  • 300g caster sugar
  • 1 cinnamon stick
  • 300g amaretti biscuits
  • 175g butter
  • 90ml Amaretto liqueur
  • 3 eggs
  • 40g plain flour
  • Icing sugar to serve
  • Mascarpone and ground cinnamon to serve
  1. Place the chopped rhubarb, 250g caster sugar, the cinnamon stick and a splash of water in a pan and simmer until tender but chunky. Drain the rhubarb in a sieve to dry out the mixture and set aside covered overnight. (Or for at least 1-2 hours if you can’t resist or want a moisture texture). You want a fairly dry soft rhubarb compote that won’t add to much moisture into the cake.
  2. Preheat the oven to 170°C and line a 23cm spring form tin.
  3. Place the amaretti biscuits in a food processor and blitz to fine crumbs. Add the diced butter, amaretto, eggs, the remaining sugar, and the flour. Blitz to combine to a blended paste and chill.image
  4. Spoon half the mixture into the lined tin, top with the rhubarb and then top with the remaining almond paste and smooth and level off.
  5. Bake for 30-50 minutes until golden and firm to touch. Depending on how wet the rhubarb was it may vary on the timing.
  6. Leave to cool before dusting with icing sugar. Serve with a generous spoonful of sweetened and cinnamon speckled mascarpone. (Keep in the fridge as it is very moist and will go off quickly- especially in this weather!)

Amaretto Cake with Roasted Figs


image

This should really be called ‘booze cake with roasted fruits’ as really it is open to any of your favourite tipples and topped with any complementing fruit. In my recent craving to make a polenta cake and my mum’s imminent birthday, I ended up combining these two irresistible forces and making this amaretto soaked ‘pudding cake’. Courtesy of ‘Vogue Entertaining and Travel’ who’s magazines offer not only fantastic food porn photography but some great original recipes, I replaced masarala for amaretto and it was a huge success! There was also added relief as if you notice, it is in fact egg-less……but yes it sets and eats like a dream! Who’d have thought!?

Makes one large cake (Adapted from ‘Vogue Entertaining and Travel’)

  • 300g self raising flour
  • 110g polenta
  • 60g ground almonds
  • ½ tsp bicarbonate of soda
  • 125g butter, chopped
  • 220g caster sugar
  • 300g soured cream
  • 250ml amaretto (or masala or another booze)
  • 4 large figs
  1. Preheat the oven to 170°C and grease and line a 26cm spring form cake tin.
  2. Sift the flour into a bowl and add the polenta, bicarb and almonds with a pinch of salt.
  3. Beat butter and caster sugar until fluffy and then stir in the soured cream by hand until just combined.
  4. Sift in the dry ingredients alteratively with the amaretto into the butter until just combined but don’t over-mix- it will be quick thick.
  5. Spoon into the tin, level and bake for about 50 minutes until cooked and then leave to cool. (Note: you may feel an urge to put your entire face into the cake and eat it-avoid)
  6. Once cool, top with sliced raw or roasted fresh fig halves, scatter with toasted almonds and dust with icing sugar.

Side Effects: Can cause over-consumption especially when eaten with homemade blackcurrant sorbet (see here)

image

Coconut Layer Cake


image

This is my dream cake and the second year running I’ve been treated to it for my Birthday and the second year running that my mum has cursed my name in the kitchen as she tries defiantly to ‘simply grate the coconut flesh’ that the recipe calls for. Never having made my own birthday cake (which would be a little depressing) I’ve never been lumbered with this task but I hear its tricky. The grating seems to be less demanding if you have a good food processor and grater attachment but the mission is getting the coconut flesh out of the shell….I suggest smashing forcefully.

This is a faithful Delia Smith recipe from her ‘How to Cook, Book One’ and I agree with her when she says it really makes a difference if you use fresh coconut….it’ll be worth the grated fingertips and broken floor tiles honest!

Cake

  • 175g self raising flour
  • 1 tsp baking powder
  • 3 eggs
  • 175g unsalted soft butter
  • 175g caster sugar
  • 1tsp vanilla extract
  • 1 coconut, flesh grated

Icing

  • 250g mascarpone
  • 200ml creme fraiche
  • 1tsp vanilla extract
  • 1 tbsp caster sugar
  1.  

    Preheat the oven to 170°C and line 2 cake tins (about 20cm).

  2. Sieve the flour and baking powder into a bowl. Add the beaten eggs, butter, caster sugar and vanilla extract and mix using an electric hand blender until smooth. Alternatively cream the butter and sugar then add the eggs and flour etc.
  3. Mix in 75g of the grated coconut and divide between the two cake tins
  4. Bake for 30-35minutes until cooked then remove from the oven and leave to cool
  5. Make the icing by combing all the ingredients and 40g of the grated coconut.
  6. Once the cakes are cool, use a serrated knife to slice each one horizontally in two so you end up with 4 slices. Now place one slice on your serving plate followed by a layer of icing. Build up the cake with this layering in the same way.
  7. Use the remaining icing to coat the sides and the top of the cake and then cover with the remaining grated coconut. You can add some dessicated coconut here if you want too.

image

Elderflower Drizzle with Basil Icing

A little experiment with elderflower yesterday. Lemon drizzle cake is a classic favourite but I thought I’d try it with some elderflower and a subtle basil flecked icing. Fell free to leave out the basil or replace it with something more dessert-familiar like mint. I think this cake needs a bit more testing to get the exact measurements to balance the flavours (see note at the bottom) but this was what I started with and it tasted great anyway!

  • 115g butter
  • 165g sugar
  • 165g self raising flour
  • 2 eggs
  • 1 tsp baking powder
  • 1 lemon, zest
  • 4 tbsp milk
  • 150ml elderflower cordial (and a little more for the icing)
  • 100g icing sugar
  • 1 tbsp chopped basil (or mint if you prefer)
  1. Cream the butter and sugar. Then add the eggs, milk and lemon zest and sieve in the flour and baking powder. Mix.
  2. Spoon into a lined cake tin and bake for 35-40 minutes at 180 until cooked.
  3. Once the cake is cooked and it comes out the oven, while still warm, prick the surface all over and pour over the cordial and allow it to sink in and absorb. Leave to cool.
  4. To make the glaze, mix the sieved icing sugar, the mint/basil and enough cordial to get a runny but thick consistency (about 1-2 tbsp)
  5. Pour over the cake!

NOTE: I scattered some rose petals for presentation but to be honest they are very pungent and can be overpowering (if using a weak cordial I suggest not using them). The amount of cordial can be increased but I was nervous about drowning the cake. The cordial I used was unfortunately quite weak so I would suggest increasing the volume if you find the taste too subtle. Use a homemade or good quality one such as ‘bottlegreen’ for a really big elderflower hit.

image

image

Chai Apple Loaf


image

I still remember the first time I took an unexpected warming sip of a Bristol ‘Boston Tea Party’ Chai latte on a snowy cold day…it was delicious and I have never been able to enjoy it quite as much as then. But I love chai and I love cake….need I say more?

I did I bit of research and found that ’apparently’ the best way to infuse your tea of choice into a cake mixture is to infuse it into the melted butter. So I thought I’d experiment…. Even if this proves unnecessary, it certainly produced the most delicious smelling, chai-scented, nutty brown butter which would certainly make a great addition to anything baked. And if you can handle the cinnamon overload, this would be insane with my Apple Crumble Ice Cream

1 sturdy loaf

  • 150g butter (plus about 30g extra)
  • 150g golden syrup
  • 150g soft brown sugar
  • 200ml milk
  • 5 ‘teapigs’ chai tea bags/ 5 tbsp loose chai tea
  • 250g plain flour
  • 1 1/2 tsp baking powder
  • 1 tbsp mixed spice
  • 2 eggs, beaten
  • 2 crunchy apples, peeled, cored and cubed into chunks
  • 2 tbsp chai seeds (optional)
  1. Preheat the oven to 180°C.
  2. Melt the butter in a pan the add the contents of the chai teabags. Warm briefly and leave to infuse to 5 minutes.
  3. Sieve the infused melted butter into a clean pan pressing the flavours out of the strained tea which can then be discarded. Weigh the melted butter and top up to 150g. Add the sugar and syrup and melt everything together.
  4. When melted, add the milk and leave to cool
  5. Weigh out the flour and add the mixed spice and baking powder. Make a well in the centre and add the cooled sugar mixture. Stir gently to combine.
  6. Add the beaten egg and mix. Stir in the apple keeping back a handful for garnish.
  7. Pour into a lined loaf tin and top with a few chunks of apple. Scatter with the chai seeds for a crunchy topping and bake for about 50 minutes until cooked.
  8. Serve with a steaming cup of chai and some mascarpone smothered on top if you like.

Alternatively try it with pears? This loaf recipe would also be brilliant with ground ginger (minus the chai) and some preserved ginger pieces for a lovely ginger loaf.

image

image

Triple Ginger Cake with Lime Icing

It goes without saying….if you don’t like ginger, turn away now. This has three different ginger kicks with a cheeky splash of rum for good measure. This icing is lovely and sharp in contrast to the ginger but replacing the lime for rum wouldn’t go amiss! (Adapted from Delia Smith)

  • 4 pieces of stem ginger, diced
  • 2 tbsp dark rum OR ginger syrup
  • 1 tsp ground ginger
  • 1 tsp puree/grated ginger root
  • 175g unsalted butter
  • 175g caster sugar
  • 3 eggs, beaten
  • 1 tbsp molasses
  • 225g self raising flour
  • 1 tbsp ground almonds
  • 2 tbsp milk
  • ½ lime
  • 150g icing sugar
  • Crystallised ginger to garnish
  1. Preheat the oven to 170°C. Line a cake tin (about 25cmx14cm or so) with parchment
  2. Cream the butter and sugar together until pale a fluffy. Add the 3 beaten eggs, bit by bit, until combined.
  3. Stir in the molasses and the rum (or ginger)
  4. Next sieve the flour and ground ginger and fold into the mixture
  5. Add the almonds and milk and mix.
  6. Finally fold in the pureed/grated ginger root and the diced stem ginger pieces.
  7. Pour into the lined cake tin and even out. Cook in the preheated oven for about 40-50minutes until springy to touch and cooked. Leave to cool.
  8. For the icing, mix the sieved icing sugar and lime juice until a thick double cream consistency. When the cake is completely cold, drizzle generously and randomly over the cake. Garnish with small diced pieces of crystallised ginger.

image

Vitamin C Brownies

These chocolate orange brownies won’t fight off scurvy but I’m sure the Government would say you’re well on your way to one of your five a day here…..they do contain orange zest after all. Add a packet of fruit pastels and hey….new years health resolution kept. I’ve made countless amounts of brownies and all have varying textures from ‘cakey’ to ‘gooey’ but this one I would describe as ‘fudgy’ I think.

Makes, well, more than enough….(about 25 squares)

  • 225g unsalted butter
  • 350g plain, good chocolate chopped into chunks
  • 150g walnuts (or hazelnuts)
  • 4 large free range eggs
  • 350g light brown muscovado sugar
  • 225g plain flour, sieved
  • Grated zest from 2 large oranges
  1. Preheat the oven to 180°C and line a 23x32cm deep tin with parchment. Alternatively, use a few smaller tins, it just depends how thick you want the end result.
  2. Put the walnuts onto a baking tray and toast in the oven for about 10 minutes until fragrant
  3. Melt the butter in a saucepan over a low heat and once beginning to turn liquidy add the chocolate chunks and stir until melted. Put aside to cool slightly.
  4. Put the eggs, sugar and orange zest into a large bowl and whisk for a good 5 minutes or so until light, airy and creamy.
  5. Add the slightly cooled chocolate mixture into the eggs and stir to combine.
  6. Add the walnuts and fold in with the sieved flour.
  7. Pour into your prepared baking tin and bake for about 20-25 minutes until set but with a slight ‘goo’ in the middle. Allow to cool in the tin before cutting into fudgy chunks and dust with icing sugar.

Also a great gift to cunningly ply any potential life-long friends or future husbands with…………..

image

image