Posts tagged dill

Spanish Tortilla with Burrata & Herbs

I

t’s been a while since I’ve posted a recipe but I’ve certainly not stopped cooking. Engaged life has had me practicing my wife skills after all…!

I’ve shamefully never cooked a Spanish tortilla so I felt it was about time I added it to my repertoire. I have historically not had the best track record with eggs. Ask my fiancee..ahem. This is mainly due to my impatience but I’ve apparently gotten better! Wife points! I’ve forever ooooed at the prepacked tortillas in the supermarket ‘delis’ confidently telling myself I’ll make one so I’m glad I finally have because this really is a dish that is so simple and so delicious and much better made at home.

Makes the perfect Monday night dinner or the centre stage of a casual tapas feast for guests with lots of other Spanish treat.

*I am very aware that I’ve tainted the Spanish authenticity in this classic dish with Italian burrata but I challenge any of you to say you won’t be adding it and it doesn’t taste good!

Adapted from ‘Half Baked Harvest‘. I rather non traditionally but with my health in mind, roasted the potatoes slices to soften them rather than frying in oil!

Serves 6

  • 8 eggs
  • 3 potatoes (I used Maris piper), sliced to 1/2cm slices
  • 1 onion, finely sliced
  • Handful thyme & rosemary, leaves picked, chopped
  • 1 packet/bunch chives, chopped
  • 1/2 pack flat leaf parsley, chopped
  • Handful basil, leaves chopped
  • Handful dill, chopped
  • Olive oil
  • 4 slices parma ham/prosciutto
  • 1 packet rocket leaves
  • 1 ball fresh burrata – the best you can afford (use buffalo mozzarella if you can’t get burrata but don’t use normal/cheap mozzarella, it just won’t be the same!)
  • 1 lemon


  1. Preheat the oven to 200°C. Slice the potatoes and spread them evenly on a baking tray. Season and drizzle over some oil and roast for about 15 minutes or until just beginning to brown but not crisp. They should be soft at this stage but not falling apart. Set aside to cool.
  2. Heat a nonstick large frying pan on a medium heat- it is vital its non stick else you’ll have a scrambled egg mess. Add a splash of oil and gently fry the onion until soft and beginning to caramelise. Now, add the chopped rosemary and thyme and fry for a few more minutes. Set aside to cool.
  3. Turn the oven heat up to 220°C.
  4. In a bowl mix all the fresh herbs with the fried onions. Add the potatoes. Whisk the eggs well in a separate bowl and season well. Pour then eggs over the potatoes and gently stir making sure you don’t break the potatoes up.
  5. Preheat the frying pan you used for the onions on a medium heat. Pour in the potato-egg mixture moving the egg around gently at the start and then quickly spread the potatoes into an even layer.
  6. With the heat on medium low, let the eggs cook for about 5-10 minutes using a spatula now and again to tease the edges away from the sides. The aim is to let the bottom cook gently so its important not to have it too hot. Shake the pan gently now and again.
  7. Once there is a good crust around the edges and the eggs are beginning to cook in the middle, place the pan in the oven and cook for about 8 minutes or until the eggs are cooked through.
  8. Remove from the oven and let stand for about 5 minutes.
  9. When ready, carefully invert the pan onto a serving platter.
  10. Top with the rocket leaves and squeeze over a little lemon.
  11. Top with the parma ham and finally the burrata.
  12. Drizzle with some lovely extra virgin olive oil and serve! Ideal at room temperature.

Harissa Chicken With Orange Herb Barley Salad

Jess - Harissa Chicken4Jess - Harissa Chicken3

I

ts safe to say I’m a fan of Greece. The food, the weather, the glassy wakeboard inviting waters and the calming pace of life. I’ve even been partial to the odd Greek wine! I visit every year for my dose of Vitamin D and halloumi and to brush up on my water sports. But I’ll focus on the food for the time being. After experimenting with a unassuming pack of Odysea’s deliciously authentic Saganaki cheese last year it was time to venture into their range a bit more with my appreciation of Greece and the Med. Being the good natured Greek loving company that they are I arrived home one Friday evening after work to a box of delightful goodies to sample and experiment with!

And sample I did.

This recipe is adapted from a Bill Granger combination I once saw and with all the right flavours from Odysea (with the odd ‘forage in the pantry’ twist) it was the perfect foundation for my med inspired dish to help prolong the recent spring sun. The roasted oranges add a really unusual touch here along with the gentle spicing which are a perfect match with Odysea’s punchy, creamy and crumbly feta cheese. Heaps of mint, dill and lemon juice bring it all to life and sooth the post harissa spice! One to give a go on a sunny but still brisk Spring evening.

Serves 4

  • 2 small oranges
  • 1 tsp fennel seeds
  • 1 tsp cumin seeds
  • 1 tsp chilli flakes
  • 1 tsp ‘Odysea Wild Thyme & Fragrant Honey’
  • 2 tbsp olive oil
  • 200g pearl barely or spelt
  • Juice 1 lemon
  • 1 carrot grated
  • 200g ‘Odysea Greek Feta‘, crumbled in large chunks
  • Large handful mint leaves
  • Small handful dill, finely chopped
  • 2 small poussin (or 4 joints of chicken e.g. chicken legs, thighs etc)
  • 4-6 tbsp of ‘Odysea Harissa spread‘ or 2 tbsp harissa paste
  •  2 large garlic cloves
  • Salad to serve – I used a crisp mix of chicory, little gems and watercress dressed in some lemon and extra virgin olive oil (Odysea of course)
  1. Preheat the oven to 220°C.
  2. Marinade the poussin in the harissa, seasoning well and then add 1 pealed, gently crushed garlic clove to each cavity and set aside.Jess - Harissa Chicken5
  3. Slice the oranges thinly and place on a lined baking tray evenly spread. Grind the fennel, cumin and chilli flakes in a pestle and mortar and then add the honey and olive oil and mix well. Coat the oranges slices in the mixture.
  4. Bake in the oven for 20-30 minutes, keeping an eye on them until they begin to caramelise and char. This time with vary depending on how juicy the oranges are. Leave to cool slightly.
  5. Cook the barely or spelt according to the packet instructions until tender then drain well and leave to cool to room temperature.
  6. Meanwhile, turn the oven down to 190°C and place the poussin on a lined baking tray. Bake for around 40 minutes until tender and the juices run clear. Set aside to rest while you finish the salad.
  7. Add the warm oranges slices to the drained grains.
  8. Stir in the juice of the lemon, plenty of salt and pepper and the chopped dill.
  9. Scatter in the crumbled feta, the grated carrot and stir to combine.
  10. Finally, roughly chop the mint at the last minute and add to the grains and stir.
  11. Loosen with a little more lemon or a splash of extra virgin olive oil if needed
  12. Carve your rested poussin in half and serve half each alongside the grain and green salad, scattered with extra mint if you like

NOTES: This would also be lovely with a side of warm pillowy flatbreads, dipped into a cleansing and fresh lime and coriander yoghurt or tzatziki.

For a wine match I would suggest a fresh Chenin Blanc or the slightly aromatic taste of  Viognier.

Jess - Harissa Chicken2


Pistachio and Feta Dip

Jess - Pistachio feta dip2 Jess - Crackers

N

ot another dip I hear you say? And not another Moroccan and middle Eastern themed recipe. Yes. Please continue. A boozy and wonderful dinner party in the Wiltshire countryside this weekend was enhanced as it naturally would be by the addition of a Middle Eastern themed feast! And gracious guests of course! And the weather seemed to be on it best behaviour for most of the time rather suitably while we guzzled bubbly Saumur and nibbles. The downpour and lightening only theatrically threatened to steal the attention late into the evening when the food had already stolen my guests hearts. It reminded me a little of my recent venture to Morocco where a hearty downpour after a heavy humid day was still not enough to spoil the show once the hearty tanginess graced our dining tables.

Kicking off with a round (or two) of sparkling Saumur, my new and cheaper favourite alternative to Champagne, to set the tone, this cheesy spiced Turkish/Bulgarian dip went down a treat. A lovely alternative to the usual humus this is perfect with some mini ‘olive oil cracker tongues’ (see here) adapted with the addition of some sweet smoked paprika and rolled smaller and bite sized.

While the middle East is always a source of natural inspiration for me, both these recipes were inspired by a new cookbook purchase that has weakened my already full and bursting cookbook shelf. Bought on a whim having been won over in a trace by the initial sparkling textured cover and once in side, by the beautiful photos and recipe combinations that steal my foodie heart. Adapated slighty but quite welcomely without much amending. Persiana, Sabrina Ghayour. A delightful book for any cookbook collector, food lover or photography buff.

Serves 8 as a nibble with drinks

  • 100g pistachios, shelled
  • 75ml olive oil
  • 200g feta cheese
  • Handful chopped dill
  • Large bunch of coriander leaves
  • 1 garlic clove, crushed
  • 1/2 red chilli, chopped
  • 3 tbsp Greek yoghurt
  • zest 1 lemon, juice of 1/2
  • Salt and pepper
  • 1 tbsp dukka (see here) to garish (optional)
  1. Blend the pistachios and oil in a processor for 30 seconds.
  2. Add the rest of the ingredients and blend until you get a smooth but rustic texture. Season to taste
  3. Spoon onto a shallow bowl or plate. Sprinkle with any leftover dill leaves, the dukka and drizzle with a little extra virgin olive oil.
  4. Serve with olive oil crackers.

Dips and drinks were followed by a slow roasted, shredded and falling off the bone leg of  lamb spiced to the nines with Moroccan love. Zesty lime yoghurt and cumin dipping salt on the side of a fresh allotment picked raw vegetable salad….

Serves 8-10

  • 1 large leg of lamb on the bone (2.5kg approx)
  • 50g butter
  • 2 tbsp ground coriander
  • 1 tbsp ground cumin
  • 1 tbsp cumin seeds
  • 2 tsp paprika
  • 1 tsp cayenne pepper
  • 1 tsp dried thyme
  • 4 garlic cloves, crushed
  • 1 tbsp sea salt flakes
  • Handful coriander leaves to garnish

Cumin dipping salt

  • 2 tbsp cumin seeds
  • 2 tbsp flaky sea salt
  • Pinch cinnamon
  1. Preheat the oven to 160°C and line a large roasting tin.
  2. Mark deep incisions over the lamb with a sharp knife
  3. In a small bowl, place the butter, spiced, thyme, and garlic and blend into a paste. Rub the paste over the land and into the incisions.
  4. Place the lamb in the tin and pour in 1 large glass white wine. Cover with foil and cook for 4 hours.
  5. During this time, baste the lamb with any juices every 40 minutes or so.
  6. After 4 hours, turn the oven up to 190°C. Remove the foil and finish the cooking for the final 1 hour uncovered to brown the top and crisp the skin.
  7. Meanwhile, for the dipping salt, dry fry the cumin seeds in a hot frying pan for a few minutes until fragrant. Tip into a pestle and mortar and grind. Add the salt and cinnamon and grind together lightly. Tip into a small ramekin or bowl.
  8. After 5 hours, remove the lamb from the over. Cover with foil and leave to rest for about 15 minutes.
  9. When ready to serve, carve the lamb which should tenderly fall from the bone. Carve into chunky pieces and slice the herbed skin. Serve on a large warmed serving platter, scattered with coriander leaves.
  10. Serve e.g some turmeric and cumin roasted new potatoes, fresh raw green salad and a limey creamy yoghurt.

Jess - Lamb Jess - Lamb2

Pea and Avocado Dip with Sprouted Olive Oil Crackers

Jess - Cracker2

Jess - rudehealth

F

irstly I think I need to explain the mystery behind the ‘Sprouted Olive Oil Crackers’. As if the wholesome organic produce that Rude Health so stylishly provide wasn’t tempting enough, they have developed a range of ‘sprouted flours’. Nothing to do with sprouts, nothing to do with flowers…..These flours basically contain a grain that has been allowed to sprout and germinate in an environment which stimulates enzyme activity and allows for the transformation of wonderful nutrients. Soaked in water, the grains sprout and release nutrients and once slow fired and and stone ground these are captured inside these tasty flours ready for your baking purposes. Nutty, wholesome and devine, they can be used in baking like for like to add a fantastic texture and flavour layer. Here I used the flour in some lovely giant tongue shaped crackers which I often make for dinner parties as elaborate dipping utensils!

They are amazing served with dips and spreads. I’ve made these in the past but never with sprouted flour and the baking smell alone as they crisped away in the safety of the oven was enough to inspire a healthy dip to accompany.

Makes about 15 dependant on size (adapted from Ottolenghi)

  1. Preheat the oven to 220°C and line a large tray with baking parchment.
  2. In a large bowl or food processor combine all the ingredients except for the salt until you have  affirm dough.
  3. Leave to rest for 30 minutes or so in the fridge.
  4. When ready to cook, take walnut sized pieces of dough (about 15g) and roll on a floured surface into tongue or oval shaped crackers, paper thin if you can!
  5. Repeat and place on your lined backing tray. Drizzle well with olive oil and scatter with the sea salt.
  6. Bake in the oven for about 6 minutes or until crisp, golden and filling the kitchen with wonderful smells.
  7. Leave to cool on a wire rack before enjoying with a dip or choice.

Pea and Avocado Dip (Serve 4-5 as a starter/nibble)

I saw a version of this recipe in a recent Waitrose magazine. Having been invited to a last minute impromptu BBQ I felt I needed a culinary offering which is where this speedy dip was created. To my disappointment this said recipe wasn’t particularly inspiring on the taste delivery. It was a bit bland. However, with a complete recipe makeover and the addition of some forage in the pantry flavour staples I had a tasty vibrant dip in no time to accompany my sprouted olive oil crackers. Knocked out in minutes I just had time to grab a bottle of chilled white before heading out into the sun….

  • 150 peas, defrosted or fresh
  • 1 lime, juice
  • 1 crushed garlic clove
  • 1 tbsp creme fraiche
  • 15g pistachios
  • 1 avocado, chopped into chunks
  • 1 tsp spice mix (see here)
  • 60g feta cheese
  • Handful mint leaves
  • Chives, dill and chilli oil to garnish
  1. In a food processor, please the peas, lime juice, garlic, pistachios, creme fraiche, spice mix and mint. Pulse and blend until the mixture turns into a paste. You may need to scarp the sides down as you go.
  2. Add plenty of seasoning and then add the feta cheese and avocado.
  3. Blend again to form a smooth paste. If you like it a bit thinner, add some olive oil.
  4. Serve scattered with chopped dill and chives and drizzled with chilli oil

Jess - Peaavocadodip2


Balsamic Beets, Lentil and Hazelnut Salad

This can only be described as a super hearty salad. A man salad if you will. Bits and pieces foraged from both the allotment, the pantry and the dark saddened depths of the vegetable fridge draw. Not sure if its just me but does anyone else suffer from the wilting and unappetising reduced packet of dill sitting shyly in the bottom draw of the fridge? Often usually buried beneath the more popular and beautiful fresh non-reduced delights…

Put to good use here however:

Serves 2

  • 4oz Puy lentils
  • 2 raw beetroot, washed
  • 1 large garlic clove, crushed
  • Handful dill, chopped,
  • Handful of flat leaf parsley, chopped
  • Handful chives, chopped
  • 1-2 tbsp balsamic vinegar
  • Handful hazelnuts
  • Olive oil
  • Salt and fresh black pepper
  1. Preheat the oven to 200°C. Chop the beetroot into wedges and place in a roasting tray. Season and drizzle with olive oil. Roast for about 20-30 minutes until tender and beginning to crisp.
  2. Meanwhile, simmer the lentils in water for about 18 minutes until tender but with a slight bite.
  3. Roast the whole hazelnuts in the hot oven for about 8 minutes. Remove and if skinned, wrap in a tea towel and rub them until the skins peal away easily then leave to cool before roughly chopping.
  4. After the beetroot is tender enough turn the oven down to 180°C. Add the garlic and coat the beetroot in the balsamic vinegar. Continue to roast for 5-10 minutes until the balsamic begins to glaze the beetroot slightly. Remove from the oven and set aside to keep warm.
  5. Drain the lentils when ready. Season well (it will need it) and add the roasted garlicy beetroot and any balsamic juices. Add the chopped herbs and the chopped hazelnuts.
  6. Combine all well and serve. I served mine topped with some lovely pan fried sea bream and a raw shaved fennel and pea salad! Delicious…

image

image

Herby Halloumi Wrap


image

These are an enticing, comforting and friendly hug inside a warm pitta on a rainy December afternoon with the prospect of a Christmas feast approaching. A perfect semi-healthy lunch in the lead up to Christmas. I’m back home in the country air with a day of present wrapping, card writing and general festivity on the agenda. With the house and, more importantly, the kitchen blissfully to myself I welcomed the peace and solidarity and devoured these for a welcome lunch break mid Christmas chores. Alone I’ll admit but I don’t regret a thing…..a thing.

Serves 2

  • 4-6 slices of halloumi (cut thickly)
  • 2 pitta breads (For my homemade pittas see here) or warm wraps
  • Small bunch parsley/coriander
  • Small bunch basil/mint
  • Small bunch dill
  • 4 tbsp thick yoghurt
  • ½ lemon juice and zest
  • 1 tbsp runny honey
  1. If making your own the pitta breads start with these (see here) and keep warm while you deal with the halloumi. If not, lightly toast the pitta breads or warm the wraps.
  2. Chop your chosen herbs finely and add the lemon zest. Mix the yoghurt with the lemon juice and some seasoning and set both aside.
  3. Heat a frying pan until hot and add a drizzle of olive oil. Fry the halloumi slices for a few minutes each side on a high heat until golden. Add the honey and remove from the heat and coat the slices in the syrup.
  4. Now assemble your pittas. Cut each open and spoon in a some yoghurt and a handful of herbs. Add your warm sweet halloumi slices and stuff with some more of the herbs and yoghurt.
  5. Devour while warm!

image

image

Wrapped appropriately in a festive napkin….and eaten appropriately with a festive appetite!

Salmon and Dill Ravioli, Lemon Buerre Noisette


image

Only a few weeks after returning from my gap year travels I was disappointed in myself that I had gone all my (then) 18 years and one hearty gap year without ever having been to Italy! Venice and Florence had always been on my list of destinations……the land of food. So a quick ticket and a hostel bed later I found myself in the middle of Italy with a heavy bag and apron for company. Naturally with my priorities in the right place) I had both a Venetian and Tuscan cookery class booked and under my belt.

If I’m honest, I’ve never been a huge pasta fan but what could be better than making it yourself in the sunny Tuscan hills? I spent what has to be the most charming, authentic and relaxing day in a Tuscan cookery school just outside Florence on their magical estate. With wine in hand on arrival (their priorities were right) I cooked a 4 course meal using wines and rich olive oils from their own estate and learned how to make pasta. It was a day to remember. (For details see below).

However, not being a pasta fan I have not revisited the pasta section of the charmingly translated and authentic cookery book from the school- until now. I thought I’d deviate from the traditional spinach and ricotta variety I made in Florence and invented my own. For pasta lovers, making it could not be easier- I don’t even have a pasta machine! Whilst I would recommend one, as rolling it to a thin consistency did shamefully strain and unearth some hibernating arm muscles, but it was delicious. Fill your ravioli with whatever you like and coat in any sauce that takes your fancy! I’m now off to re-make the other dishes I so greedily enjoyed back in those sunny hills….watch this space

Serves 2-3

  • 200g ‘OO’ flour
  • 2 eggs
  • Pinch salt
  • Small handful of chopped dill
  • 2 salmon fillets, smoked (Mine were raw but lightly smoked which was a nice addition, alternatively used precooked smoked trout for the same texture and flavour but non-smoked salmon fillet work fine also)
  • 2 heaped tbsp creme fraiche/ricotta
  • 1 lemon, zest and 1 tbsp juice
  • 25g butter
  • 1 tbsp capers
  • Bunch of asparagus, chopped

1. Start with the pasta. Make a heaped mound of flour on a clean surface and make a well in the centre. Break in your eggs and a pinch of salt. Use a fork to whisk the eggs in a circular motion and then gradually bring in the flour from the sides bit by bit to incorporate it into the doughimage
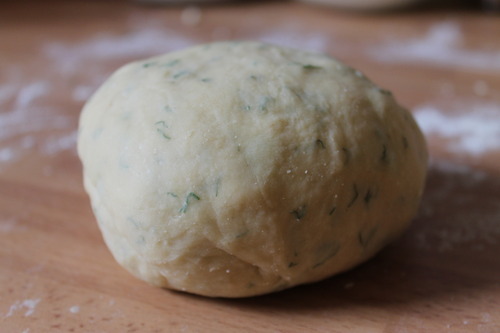
2. Once it has all be added (its may need a splash of water or wine to add a bit more moisture) knead into a ball. Add the chopped dill and then knead with the heal of your hand for a good 15-20 minutes until the dough is really smooth and it feels elastic.image

3. Wrap in cling film and rest in the fridge for at least 30 minutes.

4. Meanwhile, cook the salmon in a hot oven for about 10 minutes until just cooked but still moist. Discard the skin and flake into a bowl with some seasoning, the finely grated zest of the lemon and a squeeze of the juice. Leave to cool before stirring in the creme fraiche.

5. Once the dough has rested, remove from the fridge and use either a pasta machine or some elbow grease and a rolling pin to roll out so it is really thin.

6. Cut out circles with a pastry cutter and spoon teaspoons of cold salmon into the middle. Fold over into a half moon and sandwich together and seal with a fork.image

7. Place onto a lightly floured/.polenta coated plate.

8. Cook your asparagus spears for a few minutes and then drain and keep warm. Additionally, heat a splash of oil over a high heat and fry the capers until crisp and drain on kitchen paper.

9. Bring a large heavily salted pan of water to the boil and drop in your pasta. Simmer briskly until cooked to your liking (about 3-5 minutes depending on the thickness of the pasta) and they will rise to the surface when they are nearly ready.

10. Meanwhile, heat the butter in a large frying pan on a high heat. When it starts to sizzle, stir and allow it to turn a brown nutty colour and release a nutty aroma. Remove from the heat and stir in the lemon juice

11. Drain the pasta and serve, with the asparagus spears and drizzle generously with the lemon butter sauce. Scatter with the capers and a grating of lemon zest.

Buon Appetito!

The cookery course I did in Florence was ‘The Good Taste of Italy’ day course found here. I didn’t stay in the accommodation on the estate but I wish I had, its worth a look as they also do cookery holidays where you are housed in their stunning villa and fed silly.

image

image

imageimage

The Venetian course I did was outside of Venice and was very different. It took a more homely and casual approach set in the house of an Italian Mama. Advertised to teach you to ’cook like an Italian Mama’ it was certainly the most authentic course I could have done and there were only 3 of us in the class. After being collected, we shopped for our ingredients and picked our vegetables and herbs form their own healthy allotment before being welcomed generously to their kitchen to cook up a feast.

image

imageimage