Posts tagged lemon

Orzo and Crab


I am really not a pasta fan. I rarely eat the stuff. However, I’ve been intrigued to try these little rice-like orzo for a while now. So tonight was the night. Fried with some potted crab, mixed with some fresh lemon which was delicious and as welcome as a priest at a wedding here, scattered with fresh herbs like confetti on a bride. Please excuse the wedding metaphors. The Great British Bake Off final has just finished and the ultimate challenge was wedding cakes….

I served mine with some crispy fried seabass fillets, one of my favourites of the fish world, and some wilted spinach and peas for freshness. See what you think.

Serves 2

  • 160g orzo pasta
  • Up to 60g potted crab in spices (I used the 57g pot of ‘Seafood & Eat It’ potted crab) Or use fresh crab- even better!
  • Large handful parsley, chopped finely
  • Large handful chives, chopped finely
  • Zest and juice of 1 lemon
  • Salt and pepper
  • Olive oil
  • 2 seabass fillets
  1. Boil the pasta in salted water for about 7 minutes until cooked.
  2. While cooking, fry the crab in a little hot oil for a few minutes. Drain the pasta, reserving a splash of the cooking water, and while still loose and warm, add to the frying crab and stir to combine.
  3. Add a splash of the cooking water if dry.
  4. Add the herbs, the lemon zest, seasoning and the juice of the lemon.

image

imageimage

image5.  Keep warm while you fry the fish. Season the fillets and score the skin to stop it from curling in the pan.

6. Fry in a little hot oil for about 3 minutes, skin side down until mostly cooked. Finish on the other side for a final few minutes. Add a knob of butter to the pan and let brown while basting the fish. Serve on top of the orzo with some wilted spinach and peas.

image

Celery, Pistachio and Red Onion Halloumi Salad

I absolutely love halloumi and seem to eat it for the majority of my lunches. Served on salad, in couscous, with lentils or stuffed between the warm toasted arms of a fluffy pitta and some punchy herbs its always welcome. The weather today was shockingly poor but I fancied salad regardless. This is a fresh and satisfying one if your stuck for inspiration…

Serves 2

  • 1 little gem
  • A few large handfuls of mixed leaves -rocket, watercress, spinach
  • Small bunch of coriander, chopped
  • 2 slicks celery, sliced thinly on diagonal
  • Handful pistachios
  • ½ red onion, sliced in half moons
  • 3 tbsp red wine vinegar
  • ½ lemon
  • 1 slice stale bread, cubed (sourdough works best)
  • 1 tsp spice mix (see note), optional
  • 200g approx halloumi cheese, sliced
  1. Place the red onion slices in a shallow bowl and cover with the red wine vinegar and 1 tsp of salt.
  2. Pick the outer leaves from the little gems and cut the heart into quarters. Mix together in a large serving bowl with the salad leaves, coriander, celery, pistachios and seasoning.
  3. Heat a frying pan until hot. Add a small splash of oil and fry the halloumi slices for a few minutes each side until golden brown. Remove and drain on kitchen roll and set aside
  4. Add the cubed bread to the hot pan with a little more oil if needed. Season and scatter with the spice mix (alternatively, use a tsp of cumin seed, fennel seed or like etc). Toast until golden and crisp.
  5. Dress the salad with the lemon juice and a generous glug of extra virgin olive oil. Drain the red onions and scatter on top.
  6. Serve scattered with your warm toasted croutons and fried halloumi!

imageNOTE: My spice mix contains the following spices, toasted in a hot frying pan until fragrant and ground in a pestle and mortar.

  • 1 tbsp fennel seed
  • 1 tbsp cumin seed
  • 1 tbsp coriander seed
  • 1 tbsp fenugreek seed
  • 1 tbsp mustard seeds
  • 1 cinnamon stick, snapped in half
  • 3 cardamon pods
  • 1 star anise

Fig, Coconut and Chocolate Tart


imageimage

This is another gem of a recipe that I’d hungrily bookmarked too long ago from a fairly vintage and thumbed copy of Vogue’s ‘Entertaining and Travel’. Being unavailable in the UK, I’ve only a prized handful of these gorgeous and teasing magazines from a friends visits to Dubai. However, the recipes are a pleasing port of call for inspiration and I shall attribute the belated testing of this recipe to ‘savouring’ of my limited supply.

With a punnet of figs putting on a brave face in the face of an over-ripe death sitting safely in the fridge it seemed like an Autumn pleaser. With the added bonus that I ADORE anything with coconut it certainly was pleasing…

Makes 1 large tart (or use smaller ones if preferred)

Pastry

  • 225g plain flour
  • 2 tbsp icing sugar
  • 125g unsalted butter, chilled and cubed
  • 1 egg

Filling

  • 200g desiccated coconut
  • 300ml weak, cooled tea
  • 5 eggs
  • 220g caster sugar
  • 1 tsp vanilla extract
  • Grated zest 1 lemon
  • 100g dark chocolate, chopped (Min 70%)
  • 6 figs
  • Honey to glaze

image

  1. Preheat the oven to 180°C and grease and line a 26cm, deepish tart tin.
  2. For the pastry, place the butter, flour and icing sugar in food processor and blend until you get a breadcrumb-like texture (or rub together by hand). Add the beaten egg and combine until you form a smooth dough, being gentle when handling. Wrap in cling film and chill in the fridge for 30 minutes.
  3. Roll the chilled pastry onto a floured surface and line the greased tart tin. Place on a baking tray and chill for at least 30 minutes.
  4. Line with baking paper and fill generously with baking beans and bake blind for 15-20 minutes until the edges are a light golden. Remove the beans and return to the oven to allow the base to cook and turn pale gold. Remove from the oven and leave to cool in the tin.
  5. Reduce the oven to 170°C.
  6. Place the coconut in a large bowl and cover with the tea. Whisk the eggs, sugar, vanilla and lemon together in another bowl before adding the soaked coconut.
  7. Scatter the chopped chocolate over the base of the pastry case and top with the coconut-egg filling.
  8. Bake for about 30-35 minutes until set and golden. Leave to cool in the tin.
  9. Slice the figs into circles and place on top of the cooled tart in concentric circles. Warm a few tbsps of runny honey in a sauce pan and use a pastry brush to glaze the figs. Scatter with more coconut and serve with a large spoonful of lime/lemon scented mascarpone if you like!

image

Raspberry and Lemon Goo Brownies


image

image

Coma inducing, artery cloying, heart attack provoking…I could go on. But once in a while a little ‘indulgence’ is necessary. These are best left to be made for you by someone else. Not only for the pure reason that, this way, you won’t be exposed to their contents but because if I’m honest I had rather lost my appetite for all things sweet by the end of this weekends baking session and wasn’t able to enjoy them to their true potential. I am however, one step further away from conducting diabetes…However, if ever there was a gooey brownie recipe then this is it. I thought I’d try a little quirky take on the usual suspects by adding some lemon flavour in the form of the new Green & Black’s lemon bar which, thanks to them, I have generously stashed on the pantry shelf, teasing the rest of my ingredients with its youthful shiny complexion and style. It adds the tiniest of freshness to an otherwise rich brownie and is a nice tang with the rapsberries.

Although these brownies posed extremely sluttily and temptingly in their photo shoot when it came to sampling we actually all ended up cutting them into at least half as they are very rich. Therefore, when attempting this recipe, don’t hesitate to half the quantities used. Its obviously ridiculous but handling smaller quantities does make you feel like they are that little bit less unhealthy…!

Makes…more than enough (about 20)

  • 200g Green & Blacks Lemon chocolate
  • 100g Green & Blacks milk cooking chocolate
  • 250g unsalted butter
  • 400g soft brown muscavado sugar
  • 4 eggs
  • 140g plain flour
  • 50g Green & Blacks cocoa powder
  • 150g raspberries (or blueberries/blackberries/cherries etc)
  • Feel free to add nuts also if you like
  1. Preheat the oven to 180°C and line a 20 x 30cm brownie tin with parchment.
  2. In a large saucepan, combine the butter, chocolate and sugar and melt gently over a medium-low heat until all is melted and combined, stirring from time to time. Set aside to cool slightly.
  3. Making sure the chocolate is not too hot, beat the eggs in, one at a time, stirring vigorously. The mixture will thicken and turn smooth.
  4. Sieve in the flour and cocoa and fold in until well combined (add nuts here if using)
  5. Pour half the mixture into the lined tin, scatter with the fruits and then top with the remaining mixture. Alternatively add the fruit to the batter all at once.
  6. Bake for 30 (for really gooey) or 35 minutes until still soft in the middle. Don’t be tempted to leave them in longer if you think they are not done. They will set a little in the tray on cooling.
  7. Leave to cool in the tin before turning out and cutting indulgently. Serve proudly with a gym membership and a tangy topping of creme fraiche to your adoring, and now loyal, guests!

Delicious with the addition of chopped roasted nuts or different fruits. Serve with a lovely tangy creme fraiche, warm from the oven for extra (excuse the pun) brownie points with your guests.

image

Pea, Mint and Black Pudding Fritters


image

If you’re cringing at the thought of black pudding, I’ll be candid- man up. Its no more ‘disgusting’ than eating meat surely?! If you’ve never sampled this cheap and tasty treat, at least try it! And hopefully, like me, on you’re first sample you’ll kick yourself at all the time you wasted not enjoying it! Its deep, rich flavour works amazingly well with the sweet flavour of peas…

This recipe is a bit like a previous post (see here) for pea fritters and if you know me you’ll know that I like to fritter things. Its so easy and you can do it with loads of different ingredients and flavours with whats to hand- as long as you have eggs and flour! Here I have simply added crumbled black pudding instead of the cheese in a previous recipe and some fresh mint. A delicious light lunch.

Serves 4

  • 125ml milk
  • 2 eggs
  • 30g cornflour
  • 100g flour
  • 250g peas
  • 100-150g black pudding (cooked and crumbled)
  • Large bunch mint, leaves picked and chopped finely
  • Handful of chives, chopped finely.
  • Lemon
  1. Boil the peas for a few minutes then run under cold water. Place half the peas in a food processor and puree.
  2. Sieve in the flours, some salt, pepper. Add the beaten eggs and milk and mix until smooth.
  3. Place in a bowl and fold in the whole peas and herbs and mix well with a squeeze of lemon juice. It should be fairly thick, enough to hold its shape in a pan. Finally crumble in the black pudding.
  4. Heat a frying pan to a medium heat and warm some sunflower oil
  5. Fry spoonfuls of the mixture (as large as you like) in the hot oil for a few minutes on each side until golden brown and set in the middle. Pat fry on kitchen roll and devour.

image

image

An evening off duty and a Spanish Roast


image

image

image

Recently, I had the rare and deliciously appreciated privilege of being cooked dinner. With the responsibility of hosting and feeding guests stripped from my meddling hands, there was no way I could creep into the kitchen even for a quick stir of a bubbling pot. Instead, I was forced to sit back al fresco in the sun and enjoy a chilled glass of bubbly with some great appreciating company. And the food was quite simply delicious. I always love eating at other people houses as I get inspiration for flavours and ideas to try myself. A feast of grilled and sweetly glazed Spanish chorizo was first to grace the table followed by 2 lovingly handmade loaves of fluffy focaccia and an olive laced ciabatta with a glistening pool of olive oil for dipping. With enough chicken, BBQ ribs and salad to feed us hungry guests, we devoured it with pleasure! Thanks Chef Tipping!

Inspired by that dangerously moreish chorizo I was eager to try it. Come Sunday, a Spanish- style roast chicken feast was on the cards. Roasted chicken with gremolata, glazed chorizo, and some spicy roasted potatoes went down a treat in the balmy weather. Hands down my favourite gem of a recipe was Jeff’s grilled chorizo so this one comes courtesy of him!

image

Serves 4

Gremolata

  • 1 roasted chicken
  • Handful of flat-leaf parsley
  • ½ garlic clove
  • Zest of 1 small lemon
  1. For the gremolata, chop the garlic finely and grate over the lemon zest. Chop the parsley finely too and then add together with the garlic and lemon and chop together to combine.
  2. Add a pinch of salt and pepper and then use to scatter over your freshly roasted, succulent chicken.

Potatoes

  • 500g potatoes
  • 1-2 tbsp tomato puree
  • ½ tsp smoked paprika
  • Olive oil
  • 2 garlic cloves, skinned and crushed
  • ½ lemon, juice
  • Handful parsley
  1. Preheat the oven to 180°C . Mix the tomato puree, paprika, seasoning and about 1-2 tbsp of olive oil in a bowl.
  2. Cut the potatoes into small chunks about 2-3cm in size and cover with the dressing.
  3. Place in a lined roasting tray with the garlic and roast for 40 minutes until soft, a little crisp and cooked, turning every now and then
  4. When ready to serve, squeeze over the lemon and scatter with the parsley

Chorizo

  • 1 wheel or a few sausages of raw cooking chorizo (I used the ‘Unearthed’ range. The better quality the better it will taste. I stress that this should be ‘cooking’ chorizo that is raw and not the cured kind)
  • 1-2 tbsp Membrillo quince paste
  1. Place the chorizo on a lined baking tray
  2. Grill for about 8-10 minutes until cooked and golden brown or bake.
  3. Give the quince paste a mix to loosen it and spread evenly over the grilled chorizo. Grill again for a few more minutes until the paste has ‘melted’ over the chorizo and formed a delicious crust. Add more if you like.
  4. Slice into chunks and enjoy with your roast.

image

Rhubarb Bakewell Tart

image

image

With a bunch of prematurely picked rhubarb from the allotment aging ungracefully in the fridge this week I decided to experiment and make an ever favourite classic- the bakewell tart- with a rhubarb ‘jam’ instead of your traditional cherry or raspberry. Devine…

Note: For a more subtle flavour if you’re not an almond addict, feel free to leave out the extract.

Serves 8 (generously)

Pastry

  • 175g plain flour
  • 75g chilled unsalted butter
  • Cold water

Rhubarb Filling

  • 350g rhubarb
  • 1-2 tbsp caster sugar
  • ½ lemon juice
  • Vanilla extract

Frangipane Filling

  • 110g unsalted butter
  • 110g caster sugar
  • 110g ground almonds
  • 25g plain flour
  • 2 eggs
  • ½ tsp baking powder
  • ½ tsp almond extract
  • ½ lemon, zest
  • Handful flaked almond
  • 70g icing sugar
  1. Preheat the oven to 190°C and grease and line a 20cm tart tin. Start with the pastry and rub the butter into the flour until you have breadcrumbs. Add a few tablespoons of cold water or enough to bring it into a smooth dough. Roll out thinly and line the tart tin. Chill for at least 30 minutes.
  2. Meanwhile, make the rhubarb filling. Chop the rhubarb into pieces and place in a saucepan with the sugar, lemon juice and vanilla. Heat and simmer gently until broken down and ‘jammy’. Set aside
  3. Line the pastry case with parchment and baking beans and bake blind for 15-20 minutes until lightly golden. Remove the baking bean and return to the oven for 5 more minutes or so until the base is also lightly golden.
  4. Make the frangipane topping. Cream the butter and sugar together until fluffy. Beat in the eggs and almond extract followed by the almonds, flour, baking powder and lemon zest and mix until fully combined.
  5. Spread the rhubarb ‘jam’ evenly over the base of the pre-cooked case and top with the frangipane almond paste and smooth evenly, covering all the rhubarb. Scatter oven the flaked almonds and bake for 30-40 minutes until cooked and golden (cover with foil if it starts to colour before it is ready)
  6. Mix the sieved icing sugar with a few splashes of cold water until you form a thick paste. Spoon into a piping bag and, once the tart is cool, drizzle over!

image

Blueberry and Lemon Friands with Cinnamon Creme Anglaise

image

image

image

I’ve been wanting to make these frainds for ages! They are little ‘cakes’ that are make with egg whites and are therefore light and airy and often seen occupying the deli counters in Australia. They are a similar to financiers if you’ve ever had one but without the brown butter. In addition, I couldn’t resist making an accompanying creme anglaise with the 3 spare egg yolks!

Frainds (serve 6)

  • 100g unsalted butter, melted
  • 125g icing sugar
  • 25g plain flour
  • 85g ground almonds
  • 3 egg whites
  • 1 lemon, zest
  • 65g blueberries
  1. Preheat the oven to 200°C and grease a 6 spaced muffin tin or 6 friand moulds with plenty of butter.
  2. Sieve the flour and icing sugar into a bowl and mix in ground almonds and lemon zest.
  3. In another large clean bowl, whisk the egg whites until frothy but by no means are you looking for a meringue-like soft peak. Just mix by hand or with an electric beater until airy and foamy.
  4. Fold in the dry ingredients followed by the melted butter until incorporated.
  5. Spoon into the greased muffin mould and top with a handful of blueberries.
  6. Bake for 15-17 minutes until cooked and firm to touch with a lovely golden crust. Leave to cool in the tins before removing and dusting with icing sugar. Serve with ice cream, a coffee or my cinnamon creme anglaise!

image

Creme Anglaise

  • 6 egg yolks (3 from your friands)
  • 65g caster sugar
  • 1 tsp ground cinnamon (optional)
  • 500ml whole milk
  • 1-2 vanilla pods
  1. Whisk the egg yolks, sugar and cinnamon in a bowl.
  2. Scrape out the seeds from the vanilla and add them and the pod to a saucepan with the milk. Heat until just about to simmer and then remove from the heat.
  3. Whisk the yolks and then gently and slowly pour over the warm milk in a steady stream while continuing to whisk until all is added. Return the mixture to the saucepan and place on a very low heat. Stir continually with a wooden spoon to cook and thicken the custard making sure the heat stays low so it doesn’t scramble the egg.
  4. Continue to heat until it is thick enough to coat the back of the spoon.
  5. Strain through a sieve into a jug and serve.This could also be cooled and churned in an ice cream maker for a lovely cinnamon ice cream!

image

Fish in Brown Shrimp Butter

This really is my idea of a speedy fast-food supper which takes less than 5 minutes to cook. The longest part of the process in fact was getting the capers out the jar. Oh and chopping the parsley was fairly taxing…….

Serves 2

  • 2 white fish fillets of choice e.g. cod loin (as shown), Dover/lemon sole, plaice fillets, haddock
  • 1 small pot of potted brown shrimp (I used the Morecombe Bay brand)
  • 1 tbsp drained capers
  • Juice of ½ lemon
  • Generous handful of chopped flat-leaf parsley
  • Splash of olive oil
  1. Have all the ingredients for the sauce ready before you start as once the fish is cooked, it takes seconds and must be served warm. Heat a splash of oil and a sliver of butter in a hot frying pan.
  2. Season your fish and depending on how thick it is, fry gently on both sides until just cooked. A fillet a few centimeters thick should take 2-3 minutes.
  3. Remove from the pan and set aside to rest while you quickly make the brown shrimp sauce.
  4. Add the potted brown shrimp and its butter (If using packaged brown shrimp, add with a good tablespoon of  butter)
  5. Add the drained capers, the juice from half the lemon and a handful of chopped flat leaf parsley. Allow the butter to melt and the flavours to combine before pouring over the fish and serving! Its that simple! Serve with crusty bread or roast potatoes/mash or whatever you fancy.

NOTE: Work quickly and if the pan is too hot the butter will burn. Browning the butter will add a nice nuttiness but if it is beginning to catch, just remove the pan from the hob as the residual heat of the pan will be enough.

image

Salmon and Dill Ravioli, Lemon Buerre Noisette


image

Only a few weeks after returning from my gap year travels I was disappointed in myself that I had gone all my (then) 18 years and one hearty gap year without ever having been to Italy! Venice and Florence had always been on my list of destinations……the land of food. So a quick ticket and a hostel bed later I found myself in the middle of Italy with a heavy bag and apron for company. Naturally with my priorities in the right place) I had both a Venetian and Tuscan cookery class booked and under my belt.

If I’m honest, I’ve never been a huge pasta fan but what could be better than making it yourself in the sunny Tuscan hills? I spent what has to be the most charming, authentic and relaxing day in a Tuscan cookery school just outside Florence on their magical estate. With wine in hand on arrival (their priorities were right) I cooked a 4 course meal using wines and rich olive oils from their own estate and learned how to make pasta. It was a day to remember. (For details see below).

However, not being a pasta fan I have not revisited the pasta section of the charmingly translated and authentic cookery book from the school- until now. I thought I’d deviate from the traditional spinach and ricotta variety I made in Florence and invented my own. For pasta lovers, making it could not be easier- I don’t even have a pasta machine! Whilst I would recommend one, as rolling it to a thin consistency did shamefully strain and unearth some hibernating arm muscles, but it was delicious. Fill your ravioli with whatever you like and coat in any sauce that takes your fancy! I’m now off to re-make the other dishes I so greedily enjoyed back in those sunny hills….watch this space

Serves 2-3

  • 200g ‘OO’ flour
  • 2 eggs
  • Pinch salt
  • Small handful of chopped dill
  • 2 salmon fillets, smoked (Mine were raw but lightly smoked which was a nice addition, alternatively used precooked smoked trout for the same texture and flavour but non-smoked salmon fillet work fine also)
  • 2 heaped tbsp creme fraiche/ricotta
  • 1 lemon, zest and 1 tbsp juice
  • 25g butter
  • 1 tbsp capers
  • Bunch of asparagus, chopped

1. Start with the pasta. Make a heaped mound of flour on a clean surface and make a well in the centre. Break in your eggs and a pinch of salt. Use a fork to whisk the eggs in a circular motion and then gradually bring in the flour from the sides bit by bit to incorporate it into the doughimage
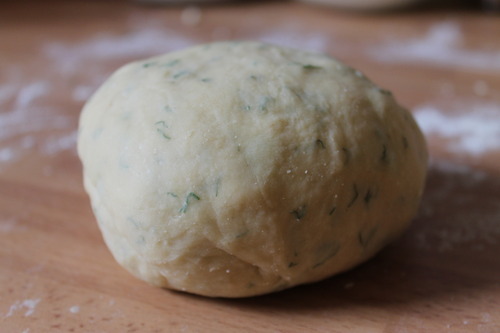
2. Once it has all be added (its may need a splash of water or wine to add a bit more moisture) knead into a ball. Add the chopped dill and then knead with the heal of your hand for a good 15-20 minutes until the dough is really smooth and it feels elastic.image

3. Wrap in cling film and rest in the fridge for at least 30 minutes.

4. Meanwhile, cook the salmon in a hot oven for about 10 minutes until just cooked but still moist. Discard the skin and flake into a bowl with some seasoning, the finely grated zest of the lemon and a squeeze of the juice. Leave to cool before stirring in the creme fraiche.

5. Once the dough has rested, remove from the fridge and use either a pasta machine or some elbow grease and a rolling pin to roll out so it is really thin.

6. Cut out circles with a pastry cutter and spoon teaspoons of cold salmon into the middle. Fold over into a half moon and sandwich together and seal with a fork.image

7. Place onto a lightly floured/.polenta coated plate.

8. Cook your asparagus spears for a few minutes and then drain and keep warm. Additionally, heat a splash of oil over a high heat and fry the capers until crisp and drain on kitchen paper.

9. Bring a large heavily salted pan of water to the boil and drop in your pasta. Simmer briskly until cooked to your liking (about 3-5 minutes depending on the thickness of the pasta) and they will rise to the surface when they are nearly ready.

10. Meanwhile, heat the butter in a large frying pan on a high heat. When it starts to sizzle, stir and allow it to turn a brown nutty colour and release a nutty aroma. Remove from the heat and stir in the lemon juice

11. Drain the pasta and serve, with the asparagus spears and drizzle generously with the lemon butter sauce. Scatter with the capers and a grating of lemon zest.

Buon Appetito!

The cookery course I did in Florence was ‘The Good Taste of Italy’ day course found here. I didn’t stay in the accommodation on the estate but I wish I had, its worth a look as they also do cookery holidays where you are housed in their stunning villa and fed silly.

image

image

imageimage

The Venetian course I did was outside of Venice and was very different. It took a more homely and casual approach set in the house of an Italian Mama. Advertised to teach you to ’cook like an Italian Mama’ it was certainly the most authentic course I could have done and there were only 3 of us in the class. After being collected, we shopped for our ingredients and picked our vegetables and herbs form their own healthy allotment before being welcomed generously to their kitchen to cook up a feast.

image

imageimage