Date Archives May 2013

Cheese Straws

I made cheese straws for a Christmas party at uni one year and they became an infamous crowd pleaser specifically with my favourite girlies on Tyndell’s Park Road! So exam time called for supplies to fuel everyone on!

This batch included simple mature cheddar with a kick of cayenne but I also made a sage, cheddar and cumin seed variety so feel free to add whatever you like. Thyme, rosemary, Dijon mustard or marmite. I’ve left quantities out as they can literally be made with any leftover puff pastry scraps and any lonely cuts of cheese!

  • A block/leftover puff pastry (see here if you want to make your own)
  • Mature cheddar cheese (or any other strong hard cheese)
  • Parmesan cheese (optional)
  • Pinch of cayenne pepper
  • 1 egg, beaten
  1. Preheat the oven to 220°C and line a large baking tray with greaseproof paper.
  2. Simply roll out your puff pastry into a rectangle to a few millimetres thick. (If using marmite, mustard, pesto or any type of spread, brush the sheet with a very thin layer at this point). Brush the sheet with beaten egg.
  3. Grate over a thin layer of cheese making sure you don’t leave the edges bare. Season with a little salt and black pepper and sprinkle with cayenne if you like (At this point add any other herbs, seasonings, spices etc)
  4. Use your rolling pin to gently press the cheese onto the pastry to keep it stuck down and cut the pastry into strips about 1.5cm wide.
  5. Take the strips at both ends and twist into a spiral and place on the tray, squashing the ends onto the tray to help them stick and hold their shape. Brush any exposed pastry with beaten egg and bake for about 15minutes checking now and again until golden.

Avoid the urge to devour the lot alone. Best eaten warm but also amazing dipped into any spicy dips or spreads or served as a canape in mini form. Their greasy buttery taste goes particularly well with a glass of Champagne and Prosecco so any excuse for a glass of fizz naturally calls for these. Try this Biancavigna, Prosecco Spumante Brut NV available at Armit Wines

image

image

Giant Coconut Lime Muffins


image

This batch was giant I tell you….maybe a little too giant? But non-iced they’d be amazing toasted for breakfast with nutella like a bounty bar! This is a pretty basic muffin mixture so feel free to add fruit or chocolate as you please….

Makes 8-9 large muffins (I recommend making them smaller)

  • 250g self raising flour
  • 1 tsp bicarb
  • 145g caster sugar
  • 1 handful dessicated coconut
  • 200ml coconut milk
  • 2 eggs, beaten
  • 85g butter, melted
  • 250g cream cheese
  • Zest of 1 lime and the juice of ½
  • 3 tbsp icing sugar
  1. Preheat the oven to 190°C.
  2. Mix the flour, bicarb, sugar and dessicated coconut in a large bowl
  3. Add the melted butter, coconut milk and the beaten eggs.
  4. Using minimal stirs to make sure the muffins are light in texture and not dense, stir until just combined (if there are a few flour lumps this is ok)
  5. Spoon generously into a muffin tin lined with cases and bake for 20-30 minutes until cooked.
  6. Leave to cool. Meanwhile, mix the creme cheese, lime zest and juice and sieve in the icing sugar.
  7. Mix well and transfer to a piping bag
  8. Only when the cakes are cool, pipe on the icing however you like and scatter with extra lime zest or coconut if you like.

image

Fish in Brown Shrimp Butter

This really is my idea of a speedy fast-food supper which takes less than 5 minutes to cook. The longest part of the process in fact was getting the capers out the jar. Oh and chopping the parsley was fairly taxing…….

Serves 2

  • 2 white fish fillets of choice e.g. cod loin (as shown), Dover/lemon sole, plaice fillets, haddock
  • 1 small pot of potted brown shrimp (I used the Morecombe Bay brand)
  • 1 tbsp drained capers
  • Juice of ½ lemon
  • Generous handful of chopped flat-leaf parsley
  • Splash of olive oil
  1. Have all the ingredients for the sauce ready before you start as once the fish is cooked, it takes seconds and must be served warm. Heat a splash of oil and a sliver of butter in a hot frying pan.
  2. Season your fish and depending on how thick it is, fry gently on both sides until just cooked. A fillet a few centimeters thick should take 2-3 minutes.
  3. Remove from the pan and set aside to rest while you quickly make the brown shrimp sauce.
  4. Add the potted brown shrimp and its butter (If using packaged brown shrimp, add with a good tablespoon of  butter)
  5. Add the drained capers, the juice from half the lemon and a handful of chopped flat leaf parsley. Allow the butter to melt and the flavours to combine before pouring over the fish and serving! Its that simple! Serve with crusty bread or roast potatoes/mash or whatever you fancy.

NOTE: Work quickly and if the pan is too hot the butter will burn. Browning the butter will add a nice nuttiness but if it is beginning to catch, just remove the pan from the hob as the residual heat of the pan will be enough.

image

Elderflower Drizzle with Basil Icing

A little experiment with elderflower yesterday. Lemon drizzle cake is a classic favourite but I thought I’d try it with some elderflower and a subtle basil flecked icing. Fell free to leave out the basil or replace it with something more dessert-familiar like mint. I think this cake needs a bit more testing to get the exact measurements to balance the flavours (see note at the bottom) but this was what I started with and it tasted great anyway!

  • 115g butter
  • 165g sugar
  • 165g self raising flour
  • 2 eggs
  • 1 tsp baking powder
  • 1 lemon, zest
  • 4 tbsp milk
  • 150ml elderflower cordial (and a little more for the icing)
  • 100g icing sugar
  • 1 tbsp chopped basil (or mint if you prefer)
  1. Cream the butter and sugar. Then add the eggs, milk and lemon zest and sieve in the flour and baking powder. Mix.
  2. Spoon into a lined cake tin and bake for 35-40 minutes at 180 until cooked.
  3. Once the cake is cooked and it comes out the oven, while still warm, prick the surface all over and pour over the cordial and allow it to sink in and absorb. Leave to cool.
  4. To make the glaze, mix the sieved icing sugar, the mint/basil and enough cordial to get a runny but thick consistency (about 1-2 tbsp)
  5. Pour over the cake!

NOTE: I scattered some rose petals for presentation but to be honest they are very pungent and can be overpowering (if using a weak cordial I suggest not using them). The amount of cordial can be increased but I was nervous about drowning the cake. The cordial I used was unfortunately quite weak so I would suggest increasing the volume if you find the taste too subtle. Use a homemade or good quality one such as ‘bottlegreen’ for a really big elderflower hit.

image

image

Asian Salmon and Coconut Rice

image

I’ve cooked this recipe far too many times in the past couple of weeks. With revision STILL on the go it is a fresh but really satisfying meal which is also a hopeless attempt at consuming some more oily fish to fuel my brain! I’ve been unhelpfully vague in the method as all depends on the rice, coconut milk and salmon you use which will vary the cooking time and the quantities a little. The timings will vary but use your instincts and aim for a crispy skinned dark soy salmon that is moist and just cooked with a creamy coconut rice. You may not get the timings perfect on the first shot but I guarantee you’ll make it again to get it right!

Serves 2

  • 1 can coconut milk
  • 4 oz brown/wild rice
  • 2 salmon fillets
  • 1 tbsp dark soy sauce
  • 1 tsp sesame oil
  • 1 ½ tbsp olive oil
  • 1 tbsp runny honey
  • 2cm grated ginger
  • 1 lime, zest and wedges for serving
  • Scattering of sesame seeds
  1. Mix the soy, oils, ginger and honey together and leave the salmon to marinade in the mix for at least 1 hour in the fridge.
  2. Bring the coconut milk to the boil with a small cup of hot water and simmer the rice gently for about 20-25 minutes until cooked. The coconut milk you use in terms of thickness will vary so top up with hot water if it starts to look dry or if it is a thick variety, dilute down. What you’re aiming for is for the rice to cook in the time that it takes the coconut milk to reduce so you should end up with a creamy rice. If it is still looking drowned towards the end of cooking, turn the heat up and simmer more strongly. I like to use brown rice for its nutty flavour and texture.
  3. Once cooked, stir in the grated zest of the lime and keep warm.
  4. While the rice is cooking, preheat your grill to high and (skin side up) grill your salmon for about 5 minutes depending on thickness, until just cooked and moist with a dark soy crisp skin.
  5. Simmer the remaining marinade in a saucepan to warm and thicken.
  6. Serve your salmon on top of your coconut rice drizzled with a little of the warm marinade. Scatter with a handful of sesame seeds and a wedge of lime for squeezing. Serve with steamed broccoli.

image

Apple Crumble Ice Cream


image

This is quite a rich ice cream and a dessert in itself. The apple puree is really deep in flavour and if cooked down a little more and thickened it would make a beautiful apple ‘butter-come-jam’ for topping toast and croissants! Goes really well with some simple hazelnut and vanilla shortbread.

  • 1 can condensed milk (alternatively make a custard base but this recipe requires no churning)
  • 300ml single cream
  • 4 large crunchy apples
  • 100g soft brown sugar
  • 1 tsp cinnamon
  • ¼ tsp mixed spice and ground ginger
  • Pinch of nutmeg
  • 125ml water
  • 50g oats
  • 50g plain flour
  • 50g soft brown sugar
  • 60g chilled, cubed unsalted butter
  1. Start with the spiced apple puree. Core and chop 3 of the apples into chunky slices. Add to a saucepan with the water and bring to the boil. Then simmer gently until the apples break down and look a bit like apple sauce.
  2. Add the sugar and spices to the hot apples and mix. Transfer to a blender and puree. Have a taste, add more sugar to your liking depending on how sweet your apples were, or lemon juice for a bit of sharpness. Remember when you add purees to ice cream they should always be a little bit on the sweet side as that way they will taste fine when frozen.
  3. Leave to cool.
  4. Mix the crumble ingredients together until you have chunky breadcrumb-like texture. Transfer to a lined baking tray and bake for about 10 minutes in a preheated 170°C oven keeping an eye on it. Don’t worry as the mixture will most likely melt into a big slab. When its golden brown leave it to cool and crisp and then you can crumble it into pieces.
  5. Cube the remaining apple into small dice and saute in a little butter to soften. Leave to cool.
  6. Mix the condensed milk and the cream (or alternatively for a proper ice cream make a custard base. The benefit of the condensed milk is there is no need for any churning) and add the apple puree. Keep some reserved if you want to ripple some through the cream before freezing.
  7. Scatter some crumble and some of the cubed apple pieces into your container of choice and top with some of the mixture. If you want to ripple some puree through, do this now. Scatter with more crumble and apple pieces and repeat. Finish with a scattering of crunchy topping. Freeze until set (it will have a soft scoop texture) and enjoy!

image

Chai Apple Loaf


image

I still remember the first time I took an unexpected warming sip of a Bristol ‘Boston Tea Party’ Chai latte on a snowy cold day…it was delicious and I have never been able to enjoy it quite as much as then. But I love chai and I love cake….need I say more?

I did I bit of research and found that ’apparently’ the best way to infuse your tea of choice into a cake mixture is to infuse it into the melted butter. So I thought I’d experiment…. Even if this proves unnecessary, it certainly produced the most delicious smelling, chai-scented, nutty brown butter which would certainly make a great addition to anything baked. And if you can handle the cinnamon overload, this would be insane with my Apple Crumble Ice Cream

1 sturdy loaf

  • 150g butter (plus about 30g extra)
  • 150g golden syrup
  • 150g soft brown sugar
  • 200ml milk
  • 5 ‘teapigs’ chai tea bags/ 5 tbsp loose chai tea
  • 250g plain flour
  • 1 1/2 tsp baking powder
  • 1 tbsp mixed spice
  • 2 eggs, beaten
  • 2 crunchy apples, peeled, cored and cubed into chunks
  • 2 tbsp chai seeds (optional)
  1. Preheat the oven to 180°C.
  2. Melt the butter in a pan the add the contents of the chai teabags. Warm briefly and leave to infuse to 5 minutes.
  3. Sieve the infused melted butter into a clean pan pressing the flavours out of the strained tea which can then be discarded. Weigh the melted butter and top up to 150g. Add the sugar and syrup and melt everything together.
  4. When melted, add the milk and leave to cool
  5. Weigh out the flour and add the mixed spice and baking powder. Make a well in the centre and add the cooled sugar mixture. Stir gently to combine.
  6. Add the beaten egg and mix. Stir in the apple keeping back a handful for garnish.
  7. Pour into a lined loaf tin and top with a few chunks of apple. Scatter with the chai seeds for a crunchy topping and bake for about 50 minutes until cooked.
  8. Serve with a steaming cup of chai and some mascarpone smothered on top if you like.

Alternatively try it with pears? This loaf recipe would also be brilliant with ground ginger (minus the chai) and some preserved ginger pieces for a lovely ginger loaf.

image

image

Portuguese Cinnamon Tarts with Lavender Caramel


image

These have been adapted from Jamie Oliver’s interpretation of the Portuguese custard tart or- ‘Pastel de nata’. It seemed like a good way of using up a slab of puff pastry and an egg whilst keeping my mind sane and grounded during all this revision…

  • ½ block puff pastry (about 250g ish)
  • Pinch cinnamon
  • 1 egg
  • 120g creme fraiche
  • Zest of 1/2  lemon
  • 5 tbsp caster sugar
  • Seeds from ½ vanilla pod/ a splash of vanilla extract
  • Small pinch of lavender flowers
  1. Preheat the oven to 200°C. Roll out the pastry into a rectangle, about 1 pound coin thickness and about 25cm long. Scatter with the cinnamon and roll into a swiss roll shape down the long side.
  2. Cut into 6 rounds (they should look like uncooked danish pastries) and then liberally press each into a a non-stick or greased muffin tin pushing the pastry down in the middle and up the sides, squashing it to mould it into the tin. Bake for about 10 minutes until just going golden. You may need to use the end of a rolling pin or something round to press the middle down if it puffs up while cooking.
  3. Make the filling by mixing the beaten egg, creme fraiche, 1tbsp of the caster sugar, lemon zest and vanilla in a bowl.
  4. When the pastry seems to have cooked enough pour in the filling and cook for another 10 minutes or so until set with a slight wobble. Remove from the oven and quickly make the caramel.
  5. Melt the meaning sugar in a dry frying pan until beginning to melt. As soon as it begins to turn golden and liquidy, remove from the heat, add a scatter of lavender flowers and then quickly pour or spoon generously over the top of the tarts before the caramel becomes to hard. Allow to cool and harden.

image

Salmon and Dill Ravioli, Lemon Buerre Noisette


image

Only a few weeks after returning from my gap year travels I was disappointed in myself that I had gone all my (then) 18 years and one hearty gap year without ever having been to Italy! Venice and Florence had always been on my list of destinations……the land of food. So a quick ticket and a hostel bed later I found myself in the middle of Italy with a heavy bag and apron for company. Naturally with my priorities in the right place) I had both a Venetian and Tuscan cookery class booked and under my belt.

If I’m honest, I’ve never been a huge pasta fan but what could be better than making it yourself in the sunny Tuscan hills? I spent what has to be the most charming, authentic and relaxing day in a Tuscan cookery school just outside Florence on their magical estate. With wine in hand on arrival (their priorities were right) I cooked a 4 course meal using wines and rich olive oils from their own estate and learned how to make pasta. It was a day to remember. (For details see below).

However, not being a pasta fan I have not revisited the pasta section of the charmingly translated and authentic cookery book from the school- until now. I thought I’d deviate from the traditional spinach and ricotta variety I made in Florence and invented my own. For pasta lovers, making it could not be easier- I don’t even have a pasta machine! Whilst I would recommend one, as rolling it to a thin consistency did shamefully strain and unearth some hibernating arm muscles, but it was delicious. Fill your ravioli with whatever you like and coat in any sauce that takes your fancy! I’m now off to re-make the other dishes I so greedily enjoyed back in those sunny hills….watch this space

Serves 2-3

  • 200g ‘OO’ flour
  • 2 eggs
  • Pinch salt
  • Small handful of chopped dill
  • 2 salmon fillets, smoked (Mine were raw but lightly smoked which was a nice addition, alternatively used precooked smoked trout for the same texture and flavour but non-smoked salmon fillet work fine also)
  • 2 heaped tbsp creme fraiche/ricotta
  • 1 lemon, zest and 1 tbsp juice
  • 25g butter
  • 1 tbsp capers
  • Bunch of asparagus, chopped

1. Start with the pasta. Make a heaped mound of flour on a clean surface and make a well in the centre. Break in your eggs and a pinch of salt. Use a fork to whisk the eggs in a circular motion and then gradually bring in the flour from the sides bit by bit to incorporate it into the doughimage
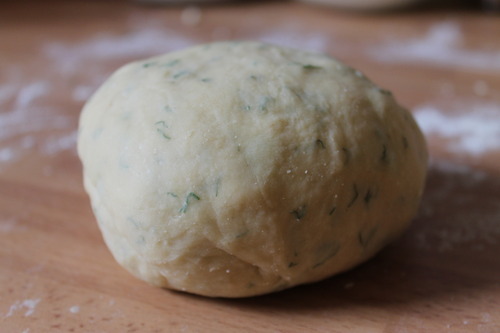
2. Once it has all be added (its may need a splash of water or wine to add a bit more moisture) knead into a ball. Add the chopped dill and then knead with the heal of your hand for a good 15-20 minutes until the dough is really smooth and it feels elastic.image

3. Wrap in cling film and rest in the fridge for at least 30 minutes.

4. Meanwhile, cook the salmon in a hot oven for about 10 minutes until just cooked but still moist. Discard the skin and flake into a bowl with some seasoning, the finely grated zest of the lemon and a squeeze of the juice. Leave to cool before stirring in the creme fraiche.

5. Once the dough has rested, remove from the fridge and use either a pasta machine or some elbow grease and a rolling pin to roll out so it is really thin.

6. Cut out circles with a pastry cutter and spoon teaspoons of cold salmon into the middle. Fold over into a half moon and sandwich together and seal with a fork.image

7. Place onto a lightly floured/.polenta coated plate.

8. Cook your asparagus spears for a few minutes and then drain and keep warm. Additionally, heat a splash of oil over a high heat and fry the capers until crisp and drain on kitchen paper.

9. Bring a large heavily salted pan of water to the boil and drop in your pasta. Simmer briskly until cooked to your liking (about 3-5 minutes depending on the thickness of the pasta) and they will rise to the surface when they are nearly ready.

10. Meanwhile, heat the butter in a large frying pan on a high heat. When it starts to sizzle, stir and allow it to turn a brown nutty colour and release a nutty aroma. Remove from the heat and stir in the lemon juice

11. Drain the pasta and serve, with the asparagus spears and drizzle generously with the lemon butter sauce. Scatter with the capers and a grating of lemon zest.

Buon Appetito!

The cookery course I did in Florence was ‘The Good Taste of Italy’ day course found here. I didn’t stay in the accommodation on the estate but I wish I had, its worth a look as they also do cookery holidays where you are housed in their stunning villa and fed silly.

image

image

imageimage

The Venetian course I did was outside of Venice and was very different. It took a more homely and casual approach set in the house of an Italian Mama. Advertised to teach you to ’cook like an Italian Mama’ it was certainly the most authentic course I could have done and there were only 3 of us in the class. After being collected, we shopped for our ingredients and picked our vegetables and herbs form their own healthy allotment before being welcomed generously to their kitchen to cook up a feast.

image

imageimage

Fried Halloumi with Minted Cous Cous

This week I am wholeheartedly and gratefully embracing the warm sunny weather we’ve been having after a looooooooong refreshing and bracing spring. I can start work on my tan which currently can only be compared to a Farrow & Ball white paint chart where I am bordering the ‘Wimborne White’ with an aim of becoming more in keeping with a natural shade of ‘Cat’s Paw’. I love the excuse to bring out all the flavourful salads I crave which just don’t meet the winter demands….

Minty Cous Cous Salad (adapted from ‘What Katie Ate’)

  • 1 tsp ground cumin
  • 100g giant cous cous
  • 200g cous cous
  • 100g pumpkin seeds
  • 60g pine nuts
  • 100g flaked and/or whole almonds
  • 2 courgettes, peeled into ribbons or sliced thinly with a mandolin
  • 4 spring onions, chopped
  • A generous handful of chopped mint, basil, parsley and coriander or a mixture of these herbs you prefer chopped finely
  • Light vegetable stock
  • Handful of rocket, watercress or leaves
  • 1 lime
  • Extra virgin olive oil
  • Halloumi to serve
  1. Heat a splash of oil in a pan and add the cumin to fry for a minute. Then add the giant cous cous and toast until fragrant for a few minutes.
  2. Add a good splash of stock to cover and cook the cous cous for about 15 minutes until soft. Drain.
  3. Toast the pumpkin seeds, pine nuts and flaked almonds in a dry pan until fragrant.
  4. Add another splash of oil to a hot frying/grill pan and add the courgette strips and char for a few minutes until crisp.
  5. Season the small grain cous cous and add a knob of butter. Pour over 300g of stock, cover and allow to absorb. Then using a fork, fluff up the grains.
  6. Now to assemble, combine the giant drained cous cous and the fluffed cous cous. Add the courgette ribbons, seeds and nuts, a generous handful of the herbs and the salad leaves
  7. Add a squeeze of lime and a drizzle of extra virgin olive oil to loosen and scatter with the spring onions.

This is delicious served with some fried halloumi and a minted lime yoghurt and flatbreads and a lovely addition to a BBQ.

image